DIY Natural Dye From Curly Dock Seeds
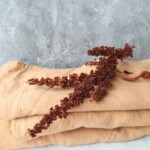
The seeds of CURLY DOCK provide a warm rose-brown color when used as a natural dye. Dying with curly dock seeds is easy, and this post will walk you through it, step by step.
Equipment
- Large dye pot
- Wooden spoon
Materials
- Curly Dock Seeds Volume about equal to the fabric you want to dye
- Fabric made from natural fibers: cotton, wool, or linen
Instructions
- Add curly dock seeds to the dye pot. There's no need to de-stem them if you don't want to.
- Fill the dye pot with enough non-chlorinated water to cover the dock seeds by about an inch or two.
- Over medium heat, warm the dye pot until it's lightly simmering. Gently simmer for 10 minutes.
- Cover the dye pot (this is really just to keep flies out and odors in), and allow the dye pot to sit for 12-24 hours. Stir a few times, being sure to keep plant material well submerged.
- After 12-24 hours, when the dye bath is looking good and strong, drain off the dye bath to remove all plant material. If you're working with a large volume, I find it works well to drain the whole bath through a floursack tea towel into a clean 5-gallon bucket. Gather up the edges of the tea towel to contain all the wet plant material, and use the towel to squeeze any remaining liquid from the plants into the dye bath. Discard the plant material.
- Rinse the dye pot to make sure no seeds are still clinging to the sides, then pour the strained dye bath back into the dye pot.
- Re-heat the dye pot just to a light simmer, then turn off the heat. Add fabric to the dye bath. (If there's not enough liquid to fully cover the fabric, you may need to add some water so that the fabric is fully covered and can move freely when stirred.)
- Allow cotton or linen fabric to sit in the dye bath for 24 hours, stirring occasionally. Wool materials will take the color more quickly, and may be ready after only a few hours. Check your fabric periodically, and when it seems as dark and vivid as you'd like, it's ok to go ahead and remove it. Keep in mind that fabric will look lighter once it's dried.
- LIGHTLY squeeze out excess liquid from your fabric, then lay it to dry. If you have old rags that you don't mind being permanently colored, you can lay down a layer of rags and allow your fabric to dye flat. I generally hang my damp fabric to dry on my clothes line.
- Once the fabric is dry, let it sit somewhere out of the sun, to "cure" for at least a day. (Two or three is even better, if you can make yourself wait!)
- Now, you can go ahead and wash your fabric. I generally put my dyed fabrics right in the washing machine and wash them in a short cold/cold cycle. The washed fabric can then be dried on the line or on a dryer.
- Dyed fabric can now be worn or worked with, and really requires very little special care. To preserve colors as long as possible, wash only when necessary, in cold or cool water, with a gentle detergent.