


Handmade Dried fruit ornaments lend a wonderful natural look to rustic Christmas decor. They're simple, frugal, and fun to make!

My daughter is just getting old enough to use my mini hot glue gun, and like all of us when we first discover the magic of hot glue - she wants to glue all the things. I still haven't outgrown this phase myself.
So one of our favorite special Mommy-Izzy time activities lately, has been finding creative crafts that we can do together, with hot glue.
Making these little ornaments out of dried fruits and spices has been one of our favorites. Because we've had such fun making them together, these little dried fruit and spice ornaments are already my favorite Christmas decorations of this year.
Whipping up a set of natural dried fruit ornaments really is easy, and the hardest part is waiting for the slices of fruit to dry.
Follow along, and I'll tell you how we made ours.
Start by drying slices of fruit
The most time-consuming part of this project is drying the fruit slices. If you already have some leftover from making a dried orange garland, or a dried citrus wreath, then you're golden!
To start from scratch, cut your fruit into thin, even slices - about 3/16" thick works best for almost any kind of fruit. I love making these ornaments with oranges, clementines, red or green pears, and small apples.
For some variation in the look of your ornaments, try slicing fruits in different directions, both horizontally (along the "equator") and vertically (from "pole to pole").
Let fruit slices dry in a dehydrator at 135° for 6-9 hours, until slices are thoroughly dry. Or, lay them on cooling racks and place them in the oven on the lowest setting possible. In the oven, they'll dry more quickly than in a dehydrator - usually in 2-4 hours. Keep a close eye since they will dry more quickly this way, and it can be very hard to predict how long they'll take from oven to oven.
For more detailed tips on how to achieve the most beautiful and perfectly colored dried fruit slices, check out this post on how to dry citrus slices, and use these tips if you're drying pears or apples.
Add spices to the dried fruit slices
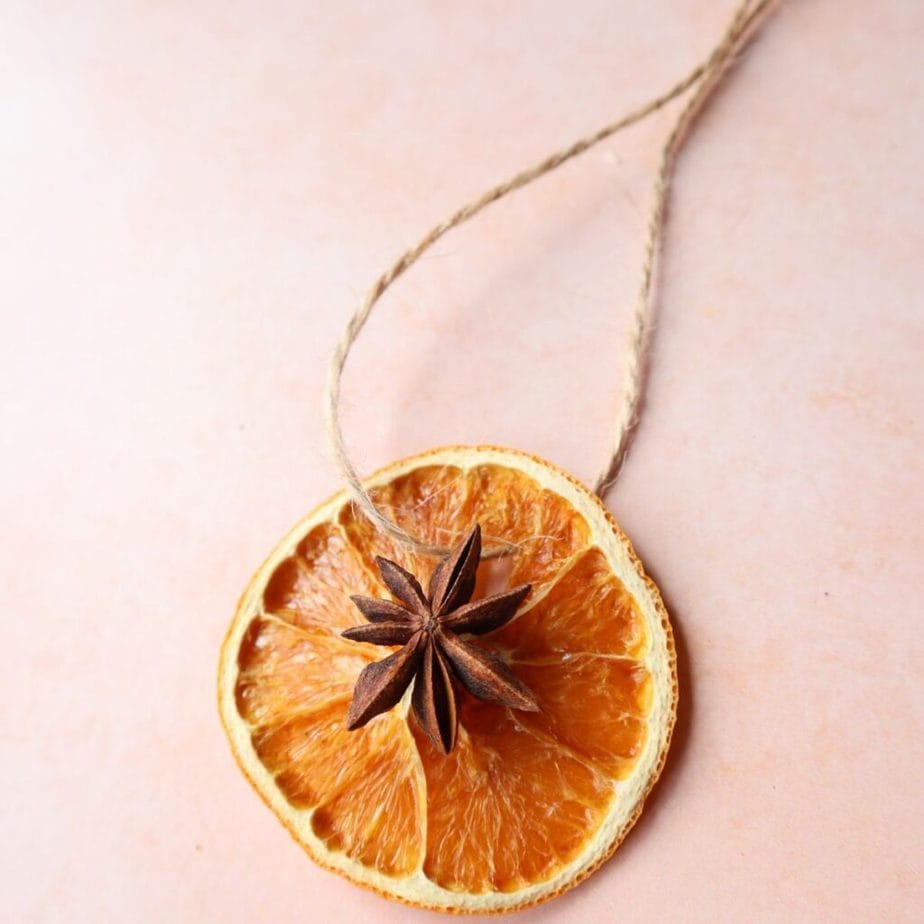
Once your fruit slices are perfectly dry, it's time for the fun part! Get out the hot glue gun (low temp is ideal for this project, but either will work!), and an assortment of spices.
For this batch of ornaments, we used star anise, because I had some on hand. Whole cloves and allspice make other beautiful and sweet-smelling additions to these ornaments.
A little glue goes a long way, and it's easy to get too much. We found the easiest way to get ornaments that didn't look gloppy or have too many strings of hot glue attached, was to put a little dot the size of a pea directly on the ornament, then gently press the spice onto the glue. You will quickly find the method that works best for you!
String ornaments on ribbon or twine
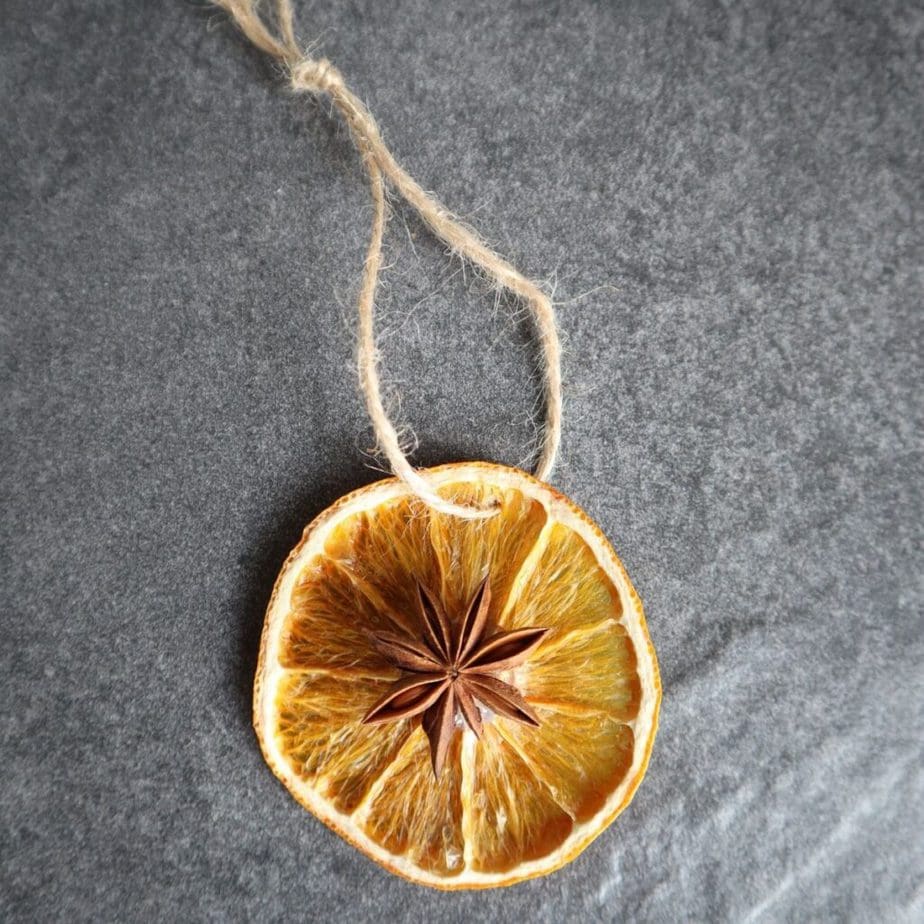
Once the ornaments are dry, it's time to fit them with a length of ribbon or string so they can be hung. A large darning needle works very well for poking a little hole, and pulling through some ribbon or help twine.
This is my favorite hemp twine to use for crafts like this one. It has that rustic look, without too many frustrating snaggles and hiccups like some types of hemp twine have.
Once you've strung through a piece of string or ribbon, just tie a little knot, and your ornaments are ready to hang!
Don't forget that you can snack on any extra dried fruit slices that you don't use. My kids love them, and they're absolutely delicious!
And if you have extra broken bits of dried orange, anise, or cloves - use them to make this easy Orange Spice Potpourri, which pretty much smells like heaven at Christmas time!
If properly dried, these ornaments last all through the holiday season without spoiling, fading, or losing their shape. (If you're really sentimental, they'll even last in an airtight container for next year, though the colors do slightly fade if kept that long.)
Have fun making your ornaments, and if you run into any questions I haven't answered - just ask away in the comments below!

Anna Chesley
Anna Chesley is a freelance writer living a homestead lifestyle, with a special love for family travel, old books, vintage skills, and seaside living. In addition to founding Salt In My Coffee, she runs the website, New England Family Life, as well as The 1800's Housewife, a website devoted to re-creating authentic 1800's recipes.


Comments
No Comments