

Did you know that you can dye fabric with goldenrod to create a beautiful yellow color? It's easier than you might think! Here's a super straightforward method for dyeing with goldenrod, that gives delightful results!
As I'm writing this, snow is swiftly accumulating outside, and the freight-train howl of a proper Nor'easter is clamoring at the windows. Warm autumn afternoons and armfuls of goldenrod seem a distant memory, so it's hard to believe that just weeks ago I was using those sunny blossoms to dye fabric in my kitchen.
Life spins on so quickly! Even though the onset of wintery weather might mean that most of us won't be dyeing anything with goldenrod again this season, I wanted to go ahead and write this post anyway, so I'll have my notes handy for next year.
Dyeing with goldenrod really is a perfect introduction to dyeing with herbs, since it's surprisingly easy, and the results are so satisfying.
It's a fun project to do with kids as well! Gathering bouquets of flowers bigger than their bodies = SO MUCH FUN.
In fact, that's exactly how this whole project started!
I'd been wanting to try dyeing with herbs for ages, and even had alum on hand just in case I felt inspired to give it a go. But the whole thing always seemed like such a project, and life is so busy, I kept not getting around to it.
One warm and breezy morning in early autumn, I was playing outside with the kids, when two giant goldenrod bouquets appeared in front of me, with uncontrollable giggling coming from behind them. "For YOU, Mama!! You can't see us, they're so big!!"
Well, what better way to treasure a pile of flowers the size of my kitchen table, then to capture their sunny color in some fabric? I decided right then that this was the day we'd try dyeing with goldenrod. It was fun project that turned out wonderfully, and I'm excited to share the super easy method that gave us great results.
How to dye fabric with goldenrod
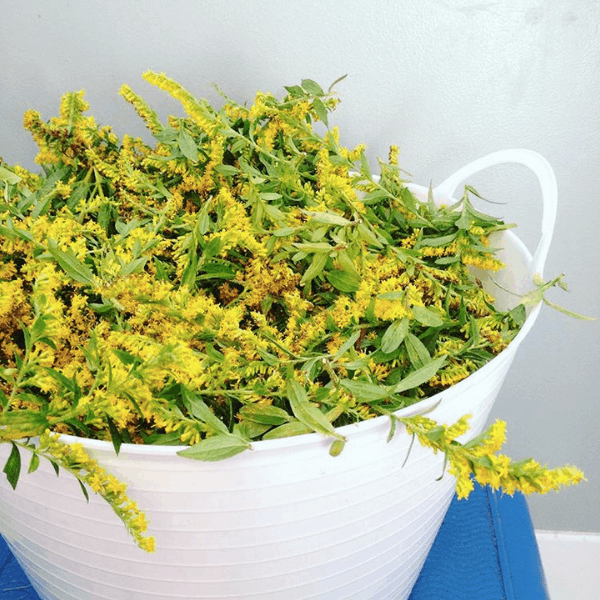
Gathering the blossoms
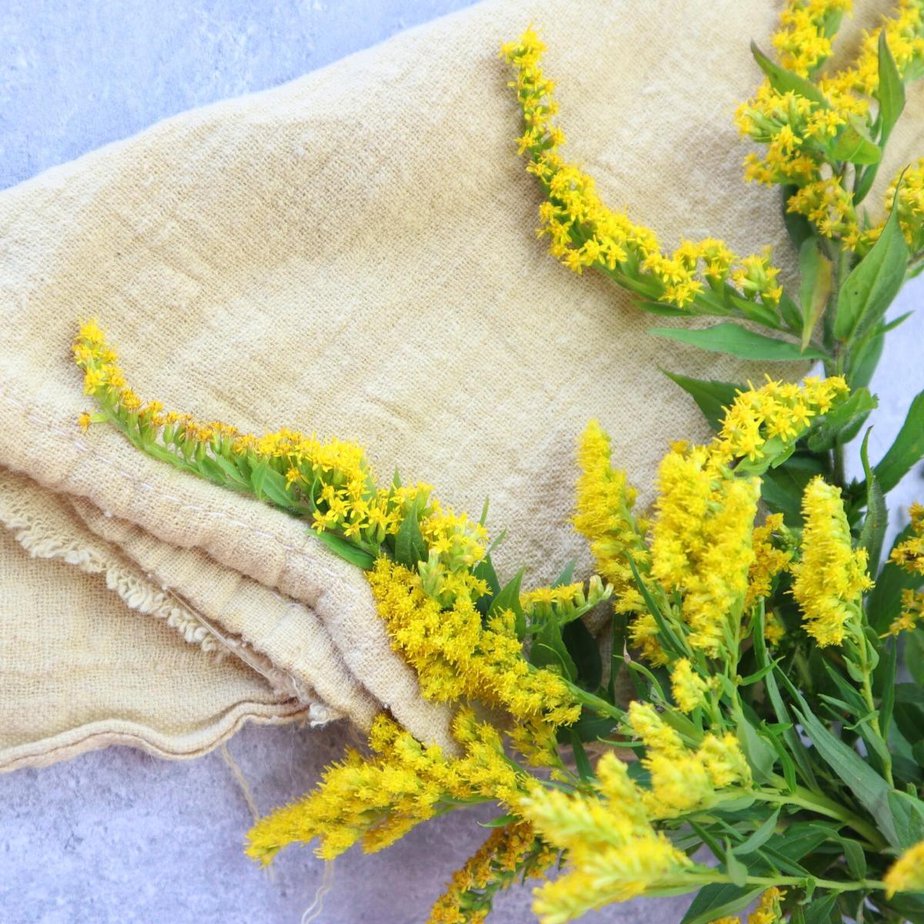
First, I turned my little flower hunters loose to gather another armful of blossoms, and then we sat down to snip the flowers from the tall stalks.
If you look up "how to dye with goldenrod" online, the opinions about how much goldenrod you need, compared to your volume of fabric or yarn, vary so wildly it's just crazy. Regardless of whether dyeing cotton, wool, or silk is being discussed, the ratios are all over the place. Seriously - if I went with the guidelines at the higher end of the spectrum, at 10-1, I'd hardly have room to fit a handkerchief in my dye pot with all that plant matter!
I went with what seemed a much more rational 1-1 ratio, and loved the results. I felt I had plenty of good color left in the water, and actually could have dyed even more fabric than I did. So personally, I recommend gathering an amount of goldenrod blossoms that's roughly equal to the amount of fabric you want to dye.
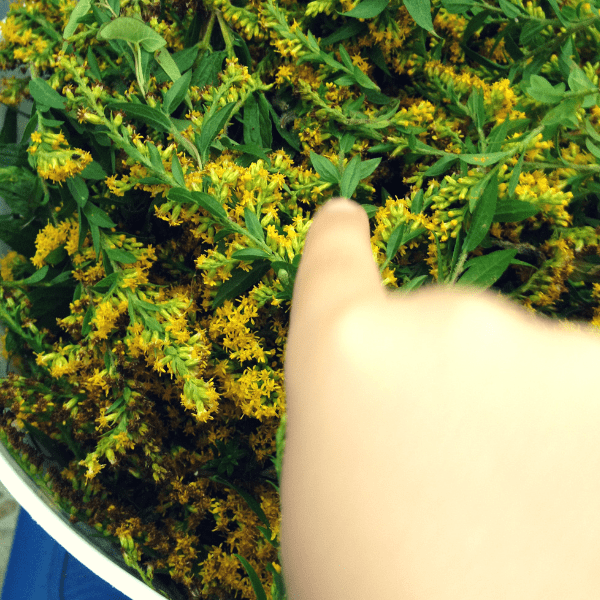
We snipped off all the flower fronds for our dye bath, and discarded the tall, woody plant stalks. In the process, my sweet little gentle-heart tried her very best to make sure that every last bug escaped, before ending up in a boiling caldron! (She's pointing out one more teensy beetle in this picture. He made his way safely outside, with many assurances of "You're ok, I gotcha!" from his gentle rescuer.)
Mordant the fabric
For this project, I used 100% cotton fabric. You can also use this method for dyeing wool.
I simmered my cloth with 1T of potassium aluminum sulfate (this pickling alum that's available right in the grocery store) to "mordant" it, which simply means preparing the fabric to be able to accept the dye color.
To accomplish this, I put my fabric in a big soup pan, then covered it with enough water to be able to stir and swish around freely. I added the alum and gave it a good stir to make sure the alum was well dissolved and mixed evenly throughout the pot. Then I let the whole thing come to a very gentle simmer, and kept it barely simmering while I boiled the goldenrod blossoms to create the dye bath - about 40 minutes.
I had great results using this inexpensive, easily available alum. However, it's worth mentioning that from reading this excellent page about mordanting fabrics, and also this one, my understanding is that using aluminum acetate instead of potassium aluminum may give a brighter color when working with a plant based fiber like cotton. It's harder to find though, and rather expensive, so as a playful hobbyist rather than a serious craftsman at this stage, I'm not putting it high on my shopping list. If I do give it go, I'll be sure to come back and update with my results!

Boil the goldenrod blossoms
As soon as I had my fabric simmering with the alum, I got my dye pot boiling.
To do this, I crammed all those blossoms into my big aluminum pressure canner. I felt the extra aluminum of the canner could only help the dyeing process.
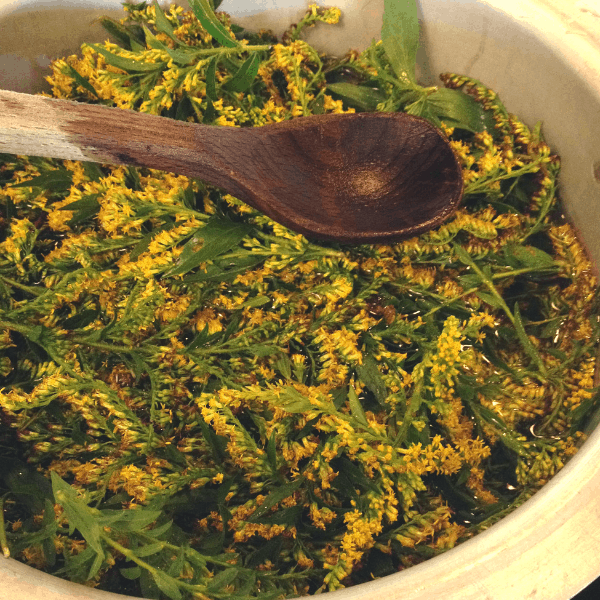
I filled the canner with plenty of water to cover the blossoms, and brought it all to a boil. A wooden spoon came in handy to keep stirring and pushing the blossoms under water until they were well "water-logged" and stayed submerged on their own.
This pot, I kept at a hearty simmer or gentle boil for a full 40 minutes.
Strain the dye bath
Next, you'll need to remove the plant matter from your dye bath. I have a large slotted spoon that worked very well to remove the bulk of the plant matter. Then I simply poured the the remaining liquid through a large sieve to remove any last bits, and returned the dye bath to the aluminum pressure canner pot.
Add the cloth, and simmer
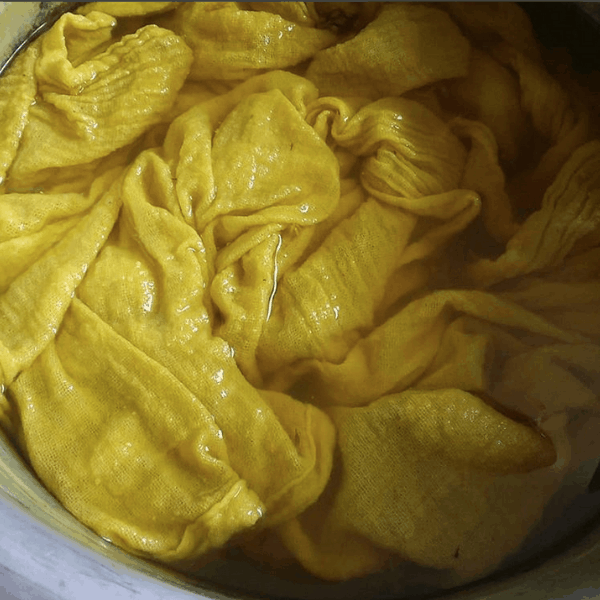
Once you've got your dye bath strained, go ahead and add the wet fabric. No need to rinse or wring out the fabric - I just used a wooden spoon to scoop the fabric out of the mordant pot, and into the dye bath.
Simmer gently for another 45-60 min. The fabric in these photos was simmered for exactly 45 minutes, then allowed to cool while continuing to sit in the dye bath. For a slightly more vivid color, I might try simmering it for an extra 15 minutes next time.
Rinse fabric in cool water until water runs clear.
I let allowed my cloth stay in the dye bath til it was mostly cool, which makes it much easier to work with than piping hot right off the stove.
Rinse the fabric very well in cool water, until water runs clear. This is a bit of an exercise in patience, since you'll be surprise how much yellow just keeps rinsing out! It's also a bit nerve wracking, since you'll have fallen so in love with the color of your fabric, as it's been simmering quietly in that dye bath, that you may feel a bit desperate at the thought of all that yellow washing out!
I will get lighter than it looks right out of the dye bath, but it's still going to be beautiful!
Once the water starts rinsing through clear, you can gently squeeze (but don't wring!) your fabric, and lay or hang it to dry.
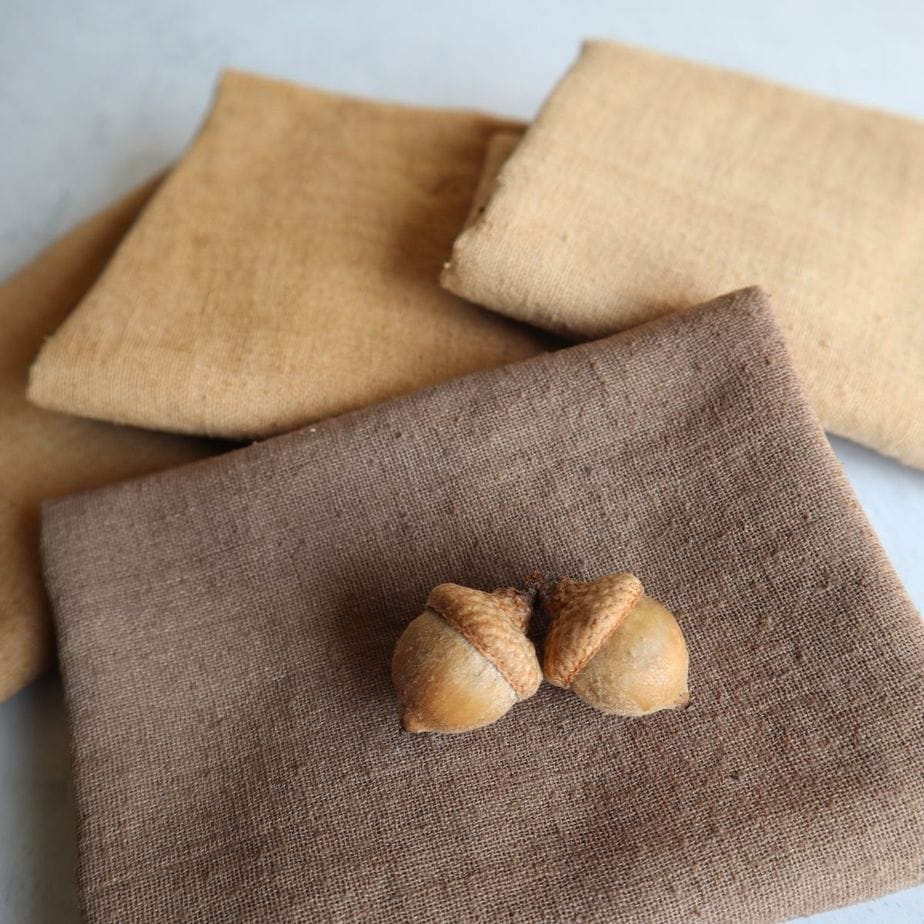
This is a completely un-edited photo of the finished fabric below, and I'm really pleased with the color!
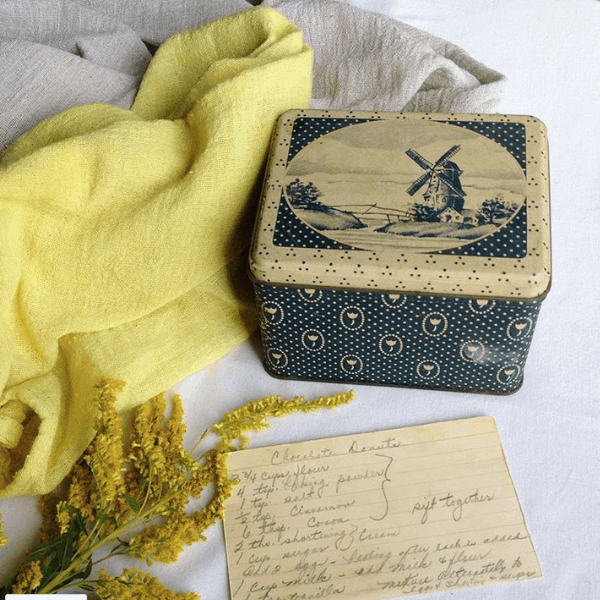
In behind the yellow fabric, you'll see a dull brownish cloth. Can you believe that this "medieval peasant garb" colored cloth was also dyed in goldenrod? It was! However, I didn't mordant the fabric, and instead of boiling the blossoms in an aluminum pot, I boiled them in an iron one. I used the same volume of blossoms to fabric, and simmered the fabric in their dye baths for the same amount of time. Isn't it amazing what a simple change of chemicals can do, when working with natural dye?
If you've been wanting to try your hand at dyeing with plants, I hope this post can help give you a little nudge to jump in and try it! It's fun, rewarding, and addictive! Have you tried dyeing with goldenrod? I'd love to hear about it! If you're looking for a plant dye that gives a deeper golden color, you may like to try dyeing with Devil's Beggartick.
Happy dyeing!
Pin for later:

Anna Chesley
Anna Chesley is a freelance writer living a homestead lifestyle, with a special love for family travel, old books, vintage skills, and seaside living. In addition to founding Salt In My Coffee, she runs the website, New England Family Life, as well as The 1800's Housewife, a website devoted to re-creating authentic 1800's recipes.

Dawn Schmidt says
I ran out of time in the fall so I froze a lot of my plant material including the Goldenrod. Of course it all looks like brown mush now but I'm still going to try it. I ran out of freezer space so I kept a cooler in the garage which worked well because I'm in Canada. We shall see what happens!
Heddy Johannesen says
where do you get the aluminum powder?
Anna says
Hi Heddy! You can get small containers of it right in the spice section of the grocery store - these are about enough for 2 or maybe 3 dye pots. Or, you can buy it in bulk through a craft supply store or Amazon (this one would last you for a good while).
Erin Fitz says
Can you dry goldenrod or freeze the plant to dye out of season? I would like to lead a natural dyes workshop in November but would liek to harvest now! Thank you for the beautiful article 🙂
Erin Fitz says
Whoops! Should have read your comments below!! If anyone can shed any light after their experiements, I would appreciate the share
Anna says
Aw, Erin, thanks for the kind words! I actually just tried experimenting with some dried goldenrod, and the color was so underwhelming I feel it's honestly not worth the effort. I'm going to try taking the few flower heads in my yard that haven't already gone by, and freeze them in a container of water - my hunch is that may keep them from freezer burning, and at least be enough to experiment with later in the winter. I'll definitely pop back here to update once I see how that goes, but I'm hoping another reader might have some experience to share for you in the meantime! If you try preserving it for later, I'd LOVE to hear how it works out for you! Totally a side note - devil's beggartick is in season many places, and I just got some gorgeous ruddy yellow colors from a batch of that. It's already such a very dry flower I have a hunch that would work really well dried, so it might be another one to consider! Wishing you the best of luck!
Cody says
This will be our first project...do you think you can use stainless steel pots and still achieve the yellow dye?
Anna says
Hi Cody! Absolutely!! Don't let that stop you at all. You may want to add just a touch extra of the alum, but you'll be just fine and should still get wonderful color!
Cody says
thank you, wish us luck!
Christine says
I can't wait to try this! Can you use dried blossoms? I'm wondering if I can gather goldenrod now and attempt this project when I ahve more time, later.
Anna says
Hi Christine, that's a great question that I'd actually wondered myself, since I've never tried it. I found this site about dyeing with goldenrod that says dried flowers don't produce a good color. They do suggest that you can freeze the "dye liquor" until you're ready to dye...but that's still a bit of a project to get things to that stage, and then a fair bit of freezer space. Not the answer we were both hoping for, but hope this helps a bit! I must say, I'm still temped to dry some myself and see what happens...
Stephanie Lane says
Hi Anna, I love this. I even like both colors. Can you use dried goldenrod flowers? Or do you have to use fresh?
Thanks,
Stephanie
Anna says
Hi Stephanie, that's a great question - I've been wondering about that recently as well. I found this site about dyeing with goldenrod that says dried flowers don't produce a good color. They do suggest that you can freeze the "dye liquor" until you're ready to dye, though. (I'm tempted to experiment with some dried blossoms anyway, just to find out what "not good color" actually is.) Anyway - that's the best information I've found so far about dried goldenrod, and hope it helps a bit! Best of luck!!
Jen says
Awesome tutorial, thanks! Is this dye permanent? The cloth could be machine washed?
Anna says
Hi Jen! Yes, I wash my goldenrod dyed garments with the regular laundry all the time. They DO fade over time, but slowly. I have items I wash weekly that end up just a very faint lemony color after a year of wash and wear. I've found that by the time goldenrod is in flower again the next year, I like to refresh them by just dyeing them again, along with any new items I'm doing. Another trick I've found is that allowing the fabric to dry right out of the dye bath WITHOUT rinsing clear, and letting it hang for several days before going back and rinsing until the water is clear, does help the color to be longer-lasting and hold up a bit better to the rigors of a modern wash cycle. (I should update the post with that tidbit!) Hope that helps a bit! Best of luck to you!
Heidi says
I love the natural yellow of the finished product. Do you have to set the colour with vinegar? I haven't done any dyeing before but I'm sure I read somewhere that vinegar helps to set colour. I think this would be fun to dry on some muslin or cheesecloth style tea towels.