


Learn how to derive a rich, brown natural fabric dye, using acorns. Add a little iron to get beautiful dusky blackish browns. There are so many color possibilities, and the process couldn't be easier!

Acorns seem to be in especially abundant supply this year, and they're currently falling by the bucketful in my backyard. For me, that meant a good excuse this week to set aside my tomato canning marathon for a couple of days, and get out my dye pots!
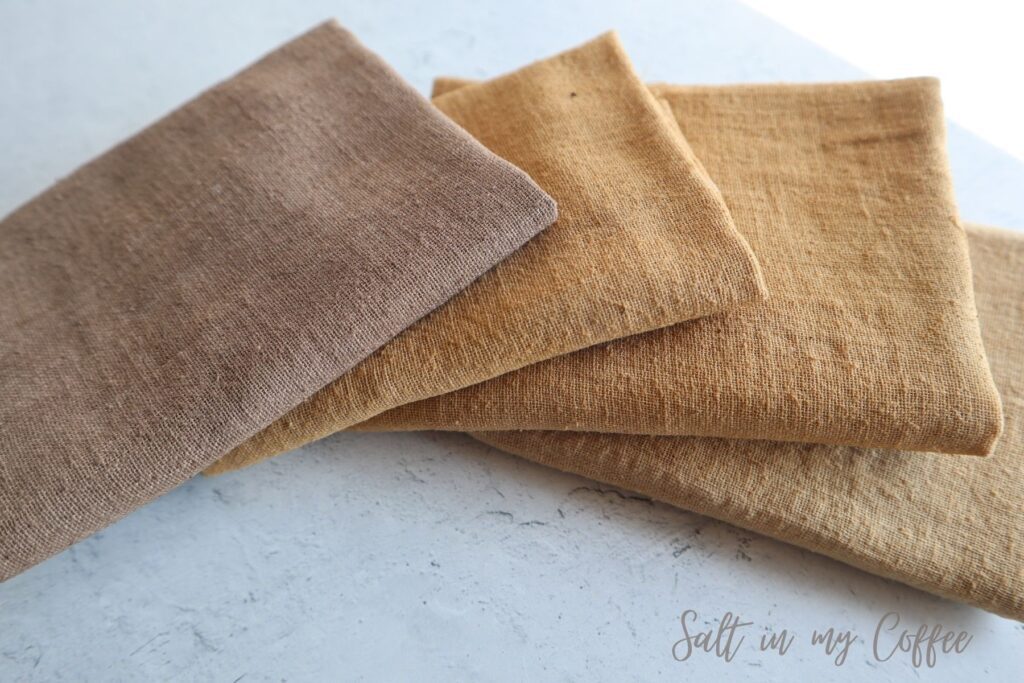
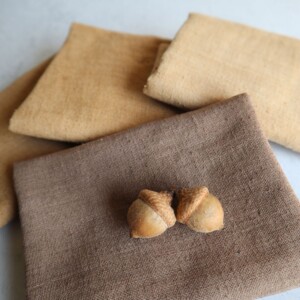
Acorns are one of my favorite natural dyes, partly because of the lovely range of shades they can produce. It's easy to get anything from a light tan, to a rich umber, to a warm blackish-brown...just by varying the length of time the acorns steep in the dye bath, the time the fabric spends in the dye bath, and the use of iron if you'd really like to take things to the dark side.
Another fun thing about dyeing with acorns is that they make the house smell like a witchy old herbalist's house - but in a pleasant, maple-syrupy, "would-you-like-a-cookie?", sort of way. It's a curious, but wholesome, type of smell, and I like it.
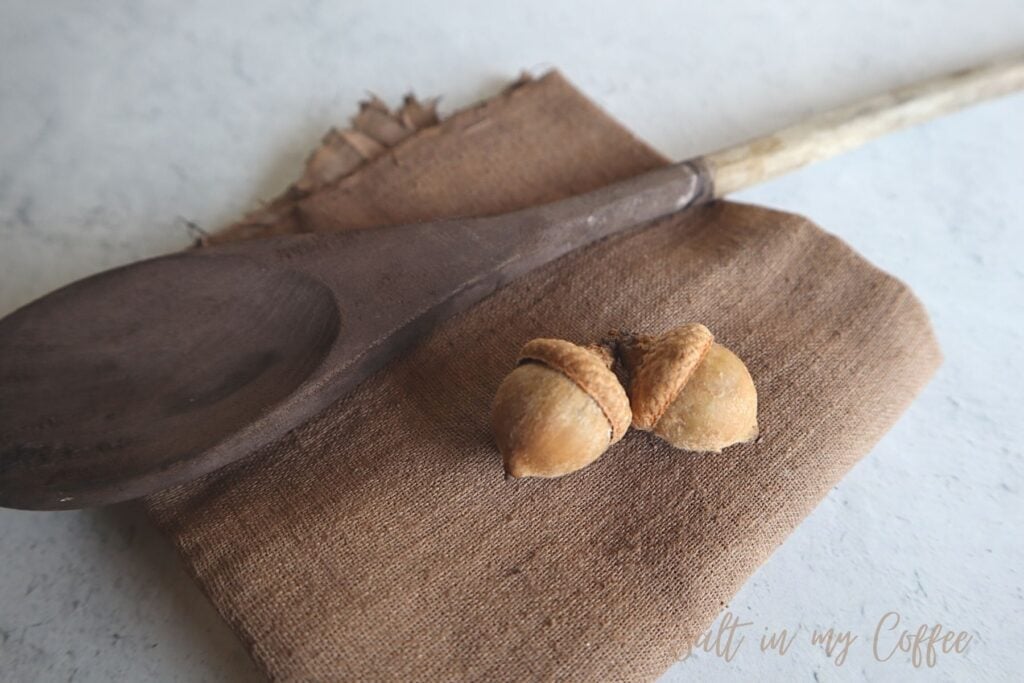
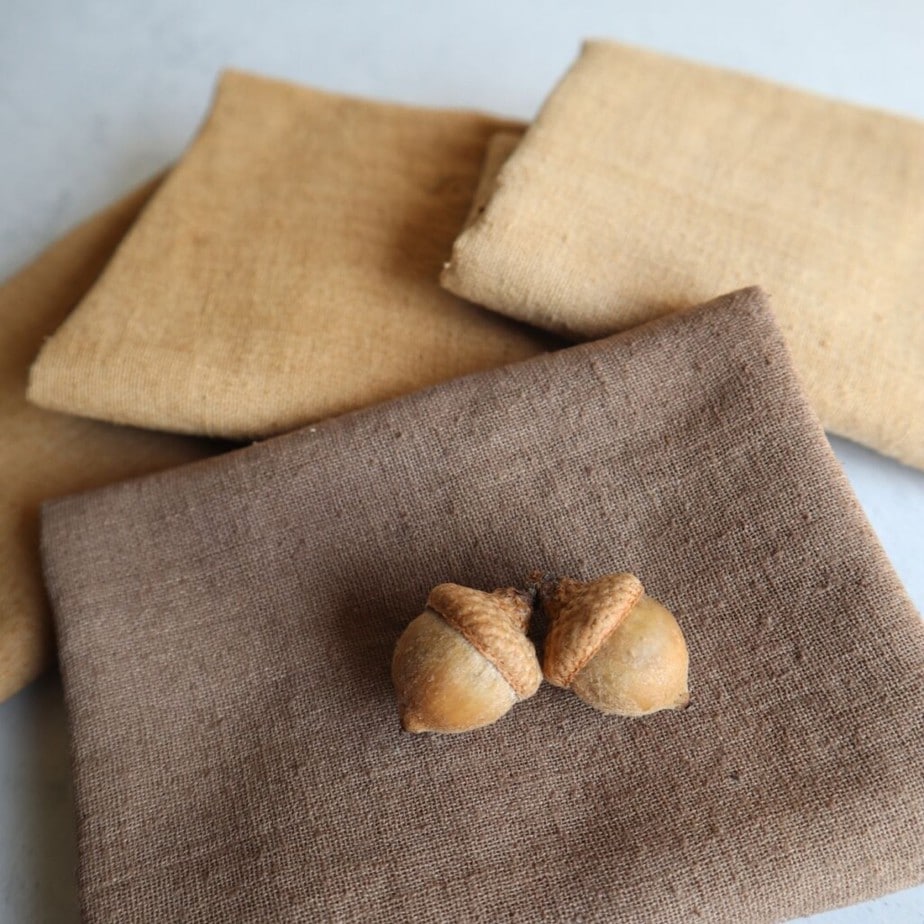
BUT - my favorite thing about dyeing with acorns, is the fun I have gathering acorns with my kids. When you're 4 and 6, and your mom says "let's gather as MANY acorns as we can!", it's both a treat and a challenge! Who can fill a pail the fastest? Who can find the most "twin" acorns that are still attached to each other? Which acorn is the queen? (I'm still stumped about that last one...)
It's just good, get-out-of-the-house, fun.
And then we get to dye things!
Dyeing with acorn really couldn't be easier, and I'll walk you through the method that's been working well for me.
1. Gather acorns for making dye
You'll want a lot of acorns. The usual rule for dyeing with plants is to use about the same volume of dye stuff, as the volume of the fabric or yarn that you wish to dye. I consider acorns an exception to this rule.
Acorns readily yield a good, rich dye. But when it comes time to strain the dye bath, they hold onto more of the liquid than something like peach leaves or bidens frondosa.
I generally use my biggest dye pot, and fill it ⅔ full with acorns - using at least twice the volume of acorns, as the volume of the fabric that I intend to dye.
As you're choosing acorns, aim for large, ripe, brown ones. It's not a big deal if you get green ones in there - they will turn brown as they cook. Do try to avoid last year's old acorns, since they tend to be bug-eaten inside, and just don't release great color the way this year's acorns will.
2. Simmer the acorns to make the dye bath
Put the acorns in your dye pot, and more than cover them with water. They're going to absorb water and swell, so you'll want the water to start out at least an inch or two deeper than the level of the acorns.
Heat the dye bath over low heat, until it's lightly simmering, and allow it to simmer for 20 minutes. Turn off the heat, and let the acorns sit in the dye bath for 24 hours. Yes, it's a long time to wait when you're eager to start dyeing, I know! But the depth of color, and the longevity of the resulting dye, are well worth the wait.
After 24 hours, bring the dye bath back to a slow simmer, and simmer for another 20 minutes. Allow the dye to cool, and then you'll be ready to strain it and start dyeing!
3. Strain the dye bath
Now, you'll need to strain off the dye bath so you don't have any bits of acorn in your final dye. I find that the easiest way to do this is to pour the whole thing through an old sheet, into a clean 5 gallon bucket. The sheet will strain out any bits of acorn, which could give an uneven color to your fabric, if left in the dye.
Keep in mind that whatever you use to strain out your acorns WILL be dyed brown. Forever.
Wash out your dye pot to remove any little bits of acorn that might be clinging to the sides. Pour your strained dye bath back into the dye pot, and return it to the stove. Bring it back to a low simmer, and then turn off the heat.
4. Add fabric or yarn to the dye bath
Add your fabric or yarn to the dye bath, making sure that it's fully immersed, and has room to move freely when you stir it. If the dye bath just barely covers the fabric, add enough water to so that you can stir it freely. This will help prevent uneven dyeing.
Keep checking on your dye bath, and observing the color of your fabric. When it reaches the color the you're looking for, go ahead and remove it from the dye bath. Keep in mind that colors will lighten as the fabric dries.
I find that in general, when I'm working with acorn dye, I get a nice light tan after about an hour. For a good warm golden brown, I leave the fabric for 12 hours or more.
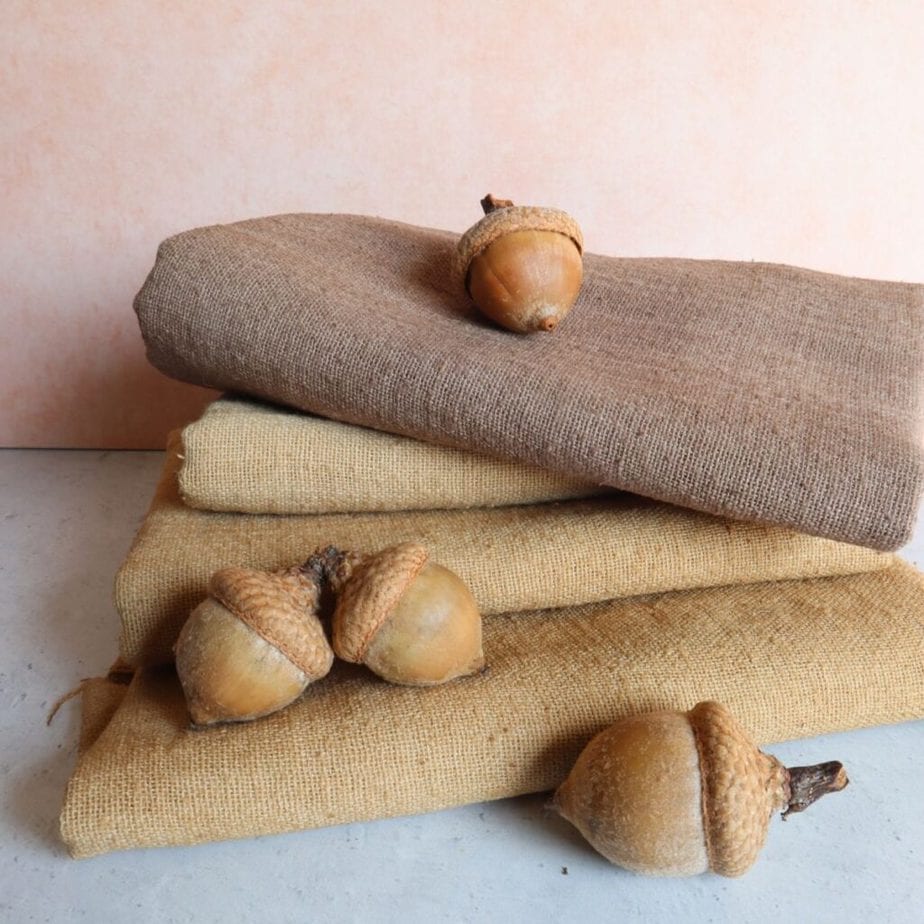
Slightly darker browns can be achieved with even longer time in the dye bath. In the photo below, the top (darkest) fabric is shifted with iron. The one right below it steeped for 12 hours, the one below that for 48 hours, and the fabric on the bottom steeped for 72. You can see that the initial hours in the dye pot make the biggest difference, and that there's not as much difference between 12 and 72 hours of dye time, as you might expect!
5. (Optional) Create an iron bath to darken the final color
If you'd like to darken your final color into more of a dark brown, brownish gray, or even black, you'll want to finish your dye process by using an iron bath. There are a few different ways to go about this. While you can just create an iron bath, and dip your acorn-dyed fabric or yarn into that to darken the color, I like adding iron to the acorn dye bath that we've already made.
To do this, the first step is to remove your fabric or yarn from the dye bath. Set it aside in a non-reactive container while you're working with the dye bath. Now, create your iron bath using one of these methods:
Create an iron bath using a homemade iron solution
If you have a homemade iron solution all ready, this is a great way to create an iron bath using the acorn dye you've already made. I recommend starting by adding 1 teaspoon of your homemade iron solution to the dye bath, mixing it thoroughly, and then adding your fabric or yarn back to the dye pot. Stir frequently and keep a close eye on it. When the color darkens as much as you'd like, go ahead and remove the fabric.
If, after 10 minutes or so in the dye bath, you're not seeing significant darkening of the fabric, you may want to add more iron solution. Remove your fabric again, add a little more iron solution, and mix thoroughly. Add your fabric back to the dye pot, and again keep a close eye on it until it darkens as much as you'd like.
The strength of homemade iron solutions can really differ from batch to bath, so starting with a small amount and working your way up is a good idea. It doesn't take much iron to make a big color shift when you're working with botanical dyes. You may be surprised how little it takes to darken your acorn dye bath!
Use iron powder to make an iron bath
To make an iron bath using iron powder, start by adding a very small amount (I recommend ⅛ teaspoon) of iron powder to a cup of water. Stir well until the powder is thoroughly dissolved.
Now, add this iron water to your acorn dye bath. Stir well to thoroughly incorporate the iron water with the dye bath.
Add your fabric or yarn back to the dye pot, and stir to ensure even dyeing as you keep a close eye on it. It shouldn't take long to start darkening. When it reaches a shade you like, go ahead and remove it from the dye bath.
Pour your dye bath into an iron pot, to create an iron bath
If you have an iron pot large enough to fit the articles that you're dyeing (you can work with them one at a time if there are several), you can simply create an iron bath by finishing the dye process in your iron pot.
This tends to be my go-to method for small batches of acorn-dyed items, and it works very well. Just pour some of your acorn dye bath into the iron pot. Use enough liquid to fully immerse your fabric or yarn, while leaving enough room to add your fabric (but don't add it just yet.)
Bring the dye bath to a slow simmer in the iron pot, and simmer for 10 minutes, stirring occasionally.
Add your fabric or yarn to the dye pot. Don't walk away - in my experience, working with a dye bath in an iron pot darkens fabric very quickly. It might only take a minute or two to achieve the color you're looking for. Gently stir to make sure your fabric is darkening evenly, and when you've achieved your desired shade, go ahead and remove it from the dye pot.
6. Dry the dyed fabric, and let it rest
I find that when I allow fabric to fully dry and "cure" for 2-3 days before then thoroughly rinsing clean, my natural dyes last much longer than when I rinse them immediately after dyeing. This difference is not as noticeable with acorn dye as with other plant dyes like bidens frondosa or curly dock seeds (acorn is a pretty lightfast dye anyway), so you may choose to skip this step.
My plant-dyed clothing gets the same rough treatment as all of our laundry, going through a hot/cold wash and dry cycle at least once a week usually. Because of this, I like taking the extra time to strongly set my natural dyes with this curing step. I have clothes I wear on a daily basis that have stayed remarkably vivid, for well over a year, since I started employing this technique.
One exception to this...iron is hard on fiber, and especially so on wool. If you've darkened your fabric with iron, you might want to consider skipping ahead to the rinsing step. I still cure my acorn-dyed fabrics that have had a brief iron bath, and so far have not noticed any weakening or increased fragility of the fabric, but you may want to err on the side of caution. If you've darkened wool yarn with iron, I'd definitely suggest skipping the cure time, and going straight to rinsing.
7. Wash and dry the finished fabric
If you've finished letting your fabric sit for a couple of days, or if you're skipping that step, it's now time to go ahead and wash your fabric until the water runs clear. When working with fabric, I usually do this by running the fabric through a short/small wash cycle, using cold water in my washing machine.
For yarn, you'll want to immerse in cool water, and rinse thoroughly until the water runs clear. You can certainly do this with fabric as well, if you'd prefer caring for it by hand to tossing it in the washing machine!
Once your fabric or yarn is fully rinsed, you can dry it. I generally dry everything on a clothesline, but with hand-dyed items I do try to limit their time hanging in strong sunlight, to help prevent fading.
Dyeing with acorns
Equipment
- Large dye pot
- Long wooden spoon
Ingredients
- Acorns
- cotton, linen or wool fabric, or yarn
- iron solution or iron powder (optional)
Instructions
Gather the acorns
- I generally use my biggest dye pot, and fill it ⅔ full with acorns – using at least twice the volume of acorns, as the volume of the fabric that I intend to dye.
Simmer acorns to create a dye bath
- Put the acorns in your dye pot, and more than cover them with water. They’re going to absorb water and swell, so you’ll want the water to start out at least an inch or two deeper than the level of the acorns.
- Heat the dye bath over low heat, until it’s lightly simmering, and allow it to simmer for 20 minutes. Turn off the heat, and let the acorns sit in the dye bath for 24 hours.
- After 24 hours, bring the dye bath back to a slow simmer, and simmer for another 20 minutes.
Strain the dye bath
- Now, you’ll need to strain off the dye bath so you don’t have any bits of acorn in your final dye. I find that the easiest way to do this is to pour the whole thing through an old sheet, into a clean 5 gallon bucket. Wash out your dye pot to remove bits of acorn that might be clinging to the sides. Pour your strained dye bath back into the dye pot, and return it to the stove. Bring it back to a low simmer, and then turn off the heat.
Add fabric or yarn to the dye bath
- Add your fabric or yarn to the dye bath, making sure that it’s fully immersed, and has room to move freely when you stir it. If the dye bath just barely covers the fabric, add enough water to so that you can stir it freely. This will help prevent uneven dyeing.
5. Create an iron bath to darken the final color (optional)
- To further darken fabric or yarn, use an iron bath to finish the dyeing process. Start by removing your fabric or yarn from the dye pot. Set it aside while you introduce the iron to the dye bath.
- You will want to thoroughly read the more detailed instructions included in the post, on creating a dye bath using either an iron solution, iron powder, or an iron pot. In brief, either add a small amount of iron solution (start with ½ teaspoon), or iron powder (start with ⅛ teaspoon) to your dye bath and mix thoroughly. OR pour the acorn dye bath into an iron pot, simmer for 10 minutes, then remove from heat.
- Add your fabric or yarn to the dye pot, and stir to ensure even dyeing as you keep a close eye on it. It shouldn’t take long to start darkening. When it reaches a shade you like, go ahead and remove it from the dye bath.
Dry the dyed fabric, and let it rest (optional)
- To help improve lightfastness and longevity of your natural color, allow the fabric or yarn to dry. Then let it sit, undisturbed and out of directly sunlight, for 2-3 days before rinsing it clean. I find that when I allow fabric to cure like this, my natural dyes last much longer than when I rinse them immediately after dyeing. This difference is not as noticeable with acorn dye as with other plant dyes (acorn dye is pretty lightfast anyway), so you may choose to skip this step. However, after a few years of working with acorn dye, I do feel my "cured" acorn-dyed articles hold onto their color more vividly, so it's something I always do. One exception to this…iron is hard on fiber, and especially so on wool. If you’ve darkened your fabric with iron, you might want to consider skipping ahead to the rinsing step. I still cure my acorn-dyed fabrics that have had a brief iron bath, and so far have not noticed any weakening or increased fragility of the fabric, but you may want to err on the side of caution. If you’ve darkened wool yarn with iron, I’d definitely suggest skipping the cure time, and going straight to rinsing.
Wash and dry the finished fabric or yarn
- Immerse yarn or fabric in cool water, and rinse thoroughly until the water runs clear. If working with fabric, I often do this step by using the gentle/small setting on my washing machine, and using cold water.Once your fabric or yarn is fully rinsed, you can dry it. If using a clothesline, try to limit the time plant-dyed items spend hanging in strong sunlight, to help prevent fading.

Anna Chesley
Anna Chesley is a freelance writer living a homestead lifestyle, with a special love for family travel, old books, vintage skills, and seaside living. In addition to founding Salt In My Coffee, she runs the website, New England Family Life, as well as The 1800's Housewife, a website devoted to re-creating authentic 1800's recipes.


Acorn says
Hello!
Everything has been going great so far until I got to the iron pot. I put the acorn liquid into an iron pan, let it simmer for 10 minutes, and added the cloth. It's been more than 2 minutes and the color doesn't seem to be changing. Do you know what could have gone wrong?
Jo Murcia says
Looking forward to trying this natural dye.
Anna says
Yay! Would love to hear how it goes for you! Have fun!!
Maria says
Thank you for this excellent tutorial, and the fabric care advice! Can't wait to go out gathering acorns.
Anna says
Oh, so glad you found it helpful, Maria! HAVE FUN!!
Carla Allen-Hart says
Can you recommend a web site to purchase pre-edged napkins for dying?