

The other day, I was gifted two flats of beautiful, perfectly-ripe strawberries.
They were just at that stage where they weren't overripe, but in another day or two they would be--and we definitely weren't going to go through two full flats of strawberries in one day!
Lately, the kids have been loving it when I put dried fruits or berries into their lunchboxes, so making a big batch of dried strawberries was no-brainer.
Drying strawberries is quick and easy, and the resulting little dried strawberries are such a treat.
Drying strawberries in a dehydrator
The first step to drying strawberries is to make sure that they're clean and dry.
If you're working with homegrown strawberries, or ones that you know are organic, you might feel fine about simply brushing them off to make sure there are no bits of dirt on there.
When working with conventionally-grown strawberries, it's never a bad idea to wash them well with a fruit and veggie wash, to make sure you're removing any pesticide residue, to the best of your ability.
Let the strawberries fully dry before slicing and adding to the dehydrator. If you work with wet strawberries, the dehydration process will take longer, and in my experience color loss is very much a disappointing result of longer dry times.
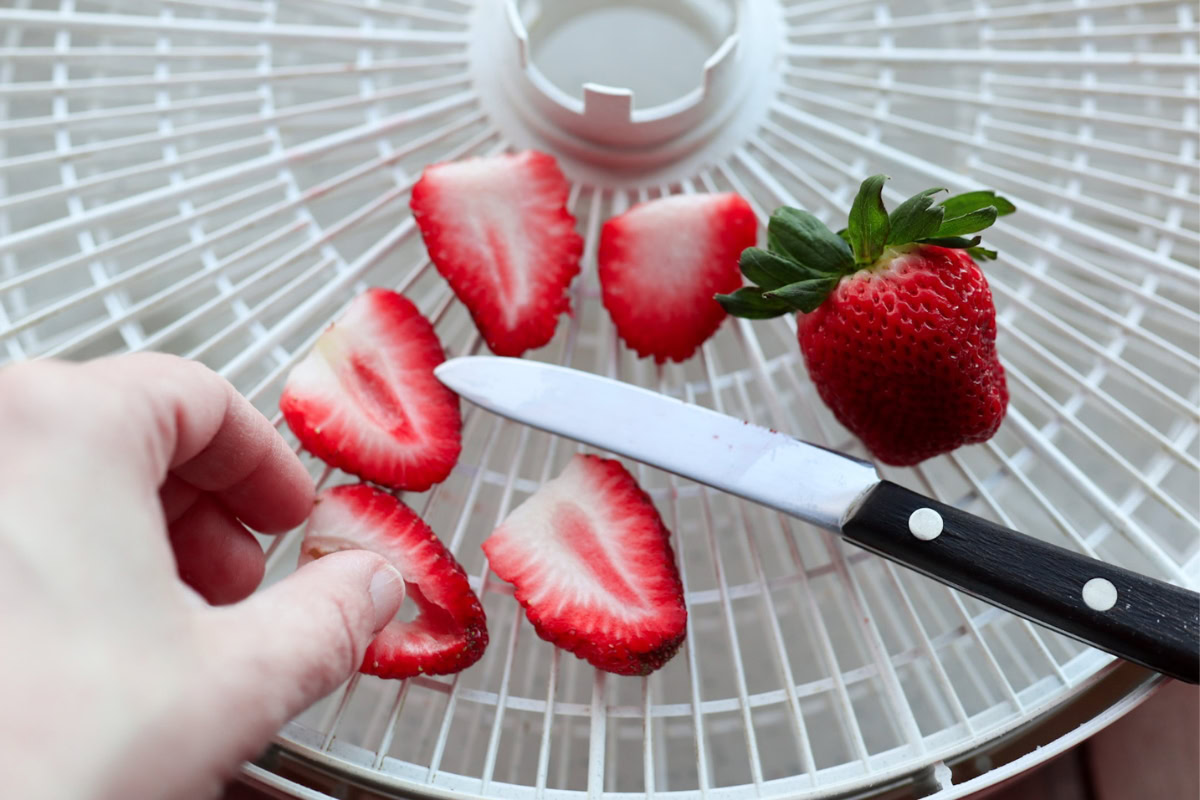
Slice the berries and arrange on trays
I find that slicing strawberries just a bit less than ¼" thin works best. This is a little thinner than most tutorials call for, but it's what's given me the best results.
Any thinner than this, and they generally turn into crispy little chips that crackle into bits when being remove from the dehydrator trays.
If they're too thick, they take longer to dry, and while the end result can still be delicious, the longer dry time seems make them prone to losing more color in the drying process.
Arrange them on your dehydrator trays with a little space between each one. Strawberries dry best if they're not touching each other.
Dry at 135 degrees
Once your dehydrator trays are loaded up, go ahead and get those strawberries drying.
At the 135 degree setting on my dehydrator, I find that strawberries generally take about 6-8 hours to fully dehydrate.
How to know when dried strawberries are done
The goal is dried strawberries that are a bit more than "leather dry", but not quite crispy-crunchy. If you can easily tear a strawberry slice in half, the batch still has a little ways to go.
One you think they're dry, let them fully cool before storing. If they feel at all damp to the touch after coming down to room temperature, don't hesitate to return them to the dehydrator and let them go a little longer. They should feel dry, not damp even a little.
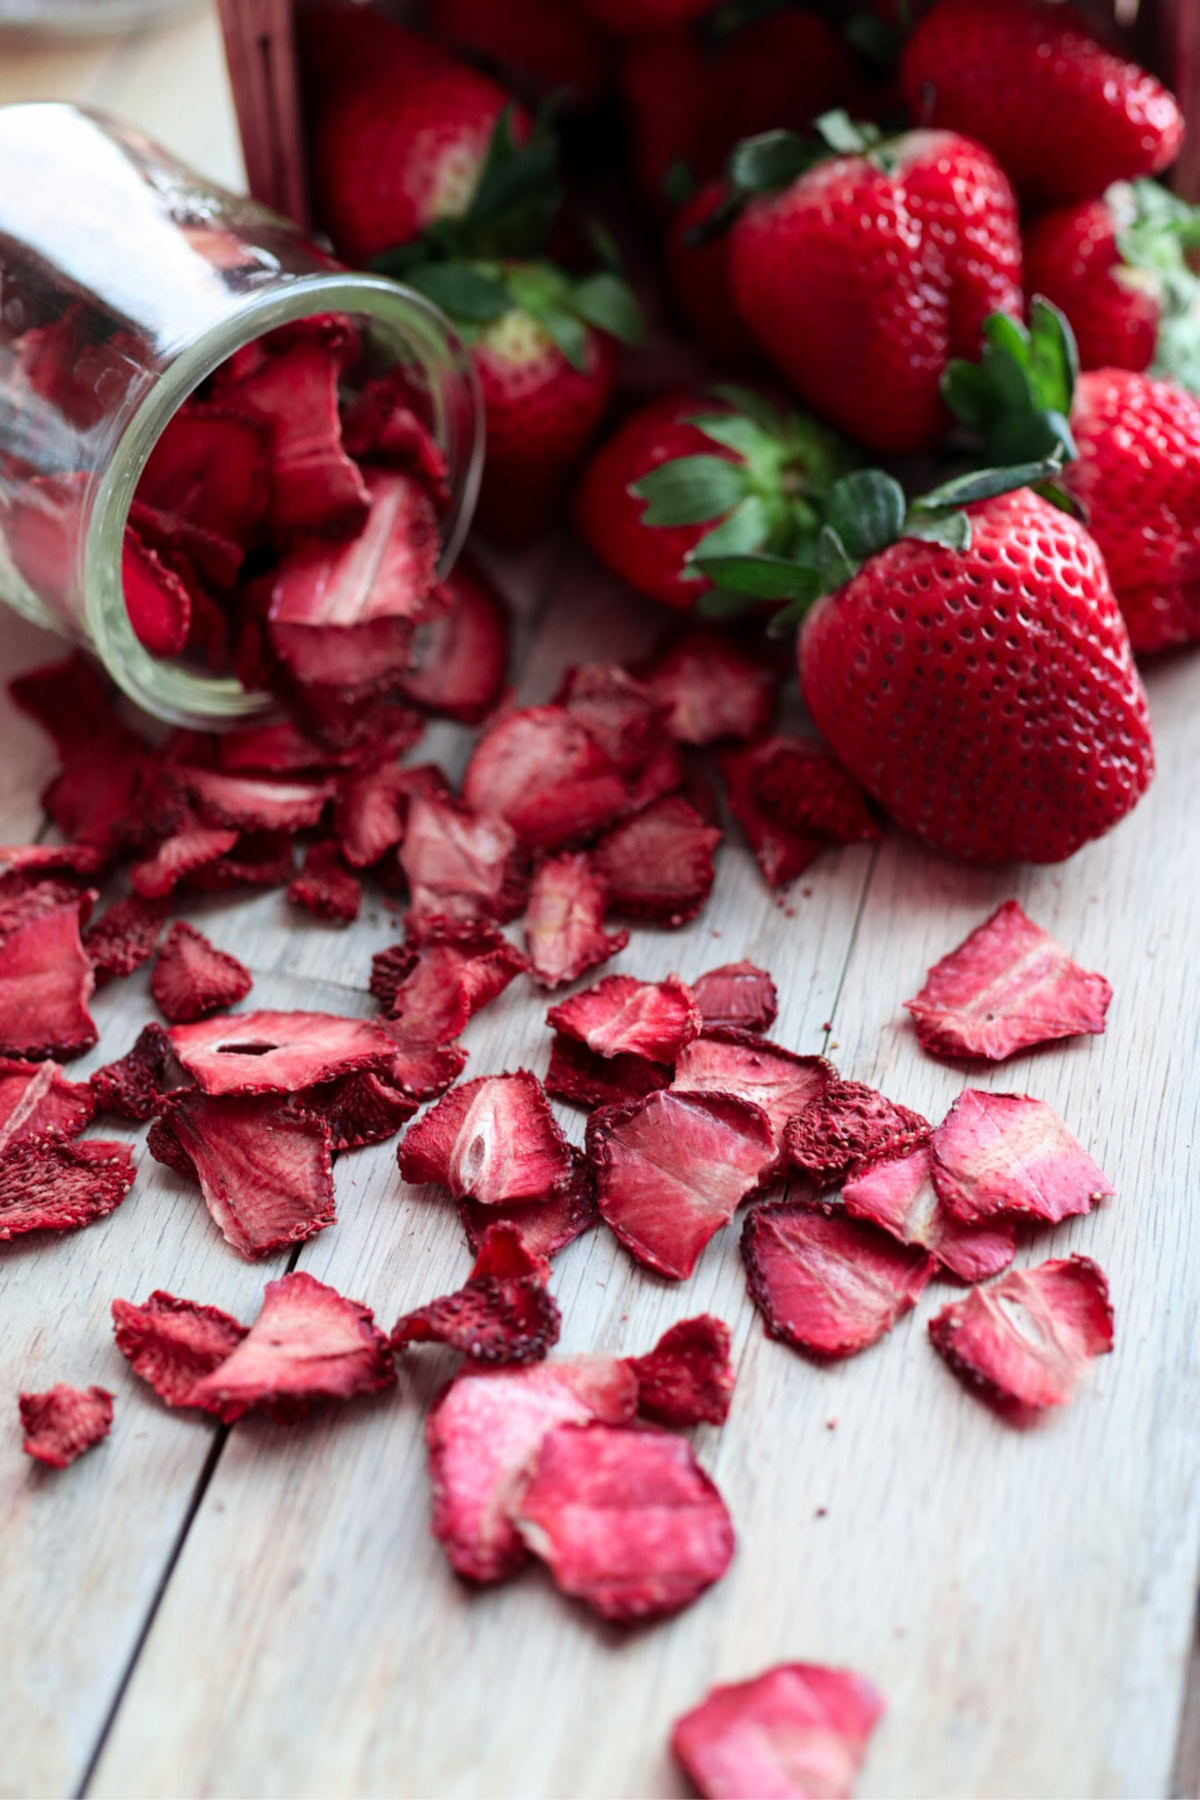
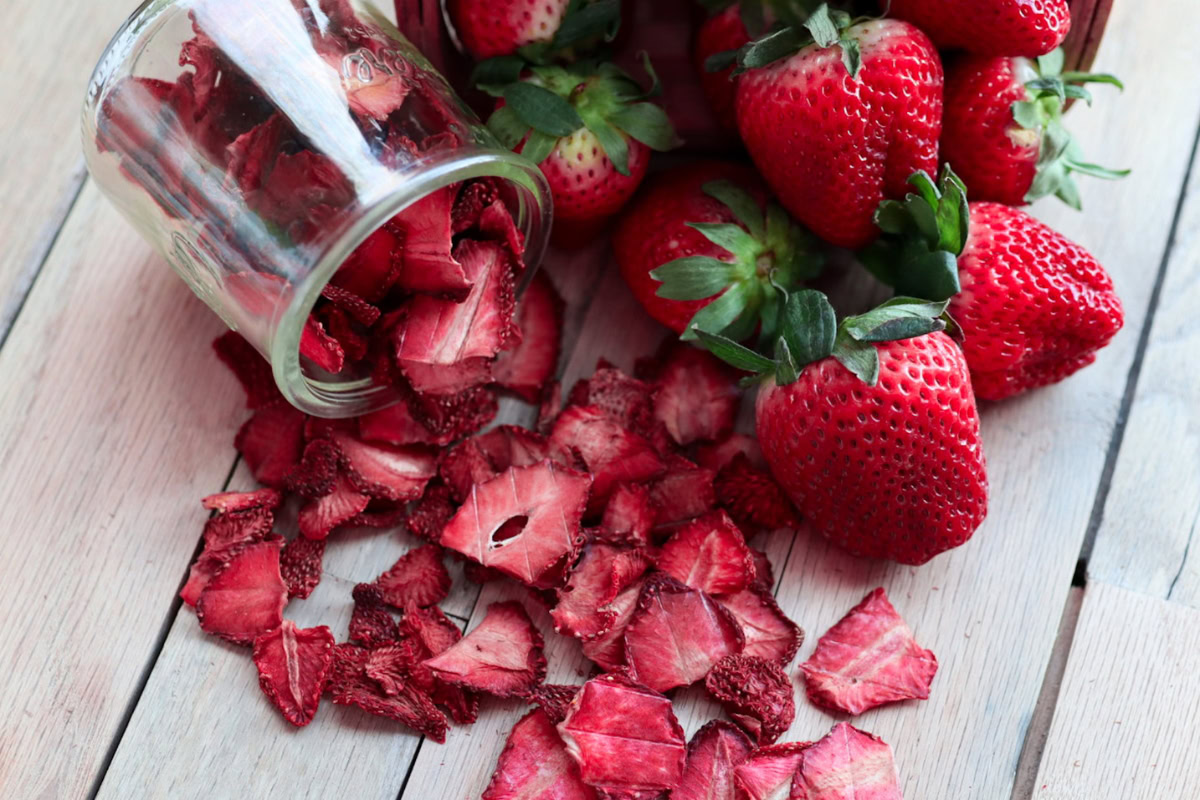
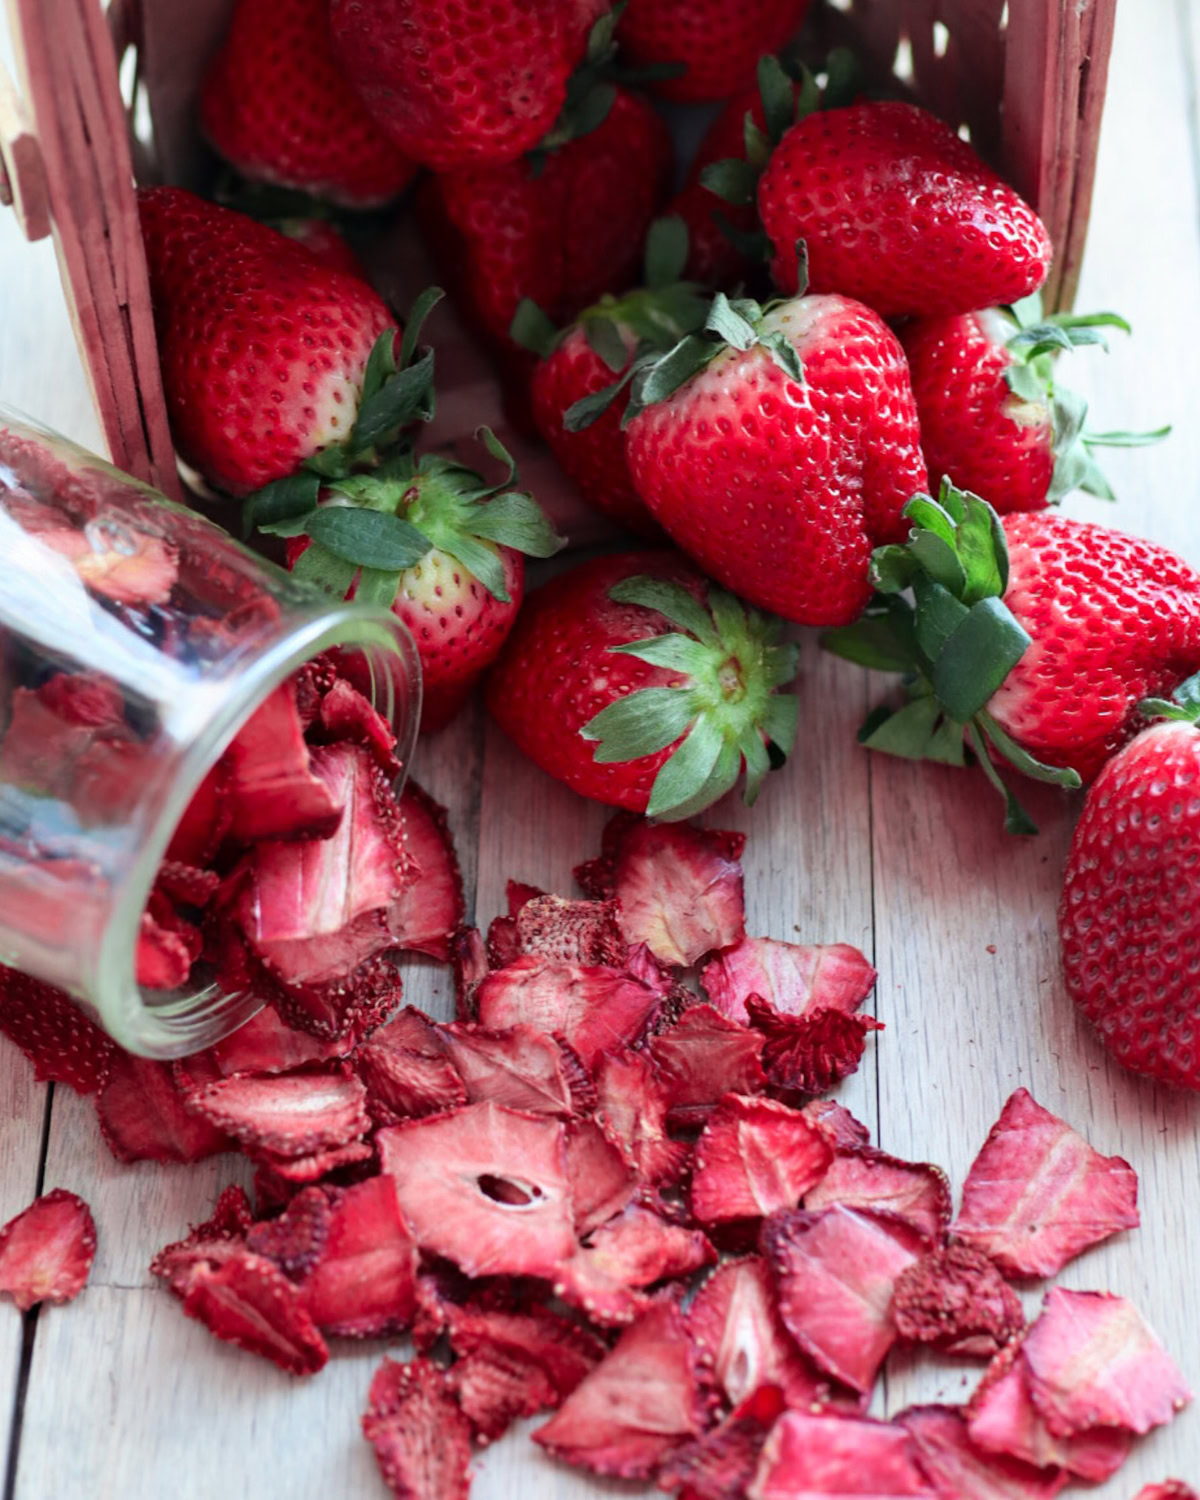
How to store dried strawberries
Once the strawberry slices are well-dried, and fully cooled to room temperature, you can go ahead and store them. An airtight container in a cool panty is the ideal location.
You'll probably find that they won't last long! However, it's good to know that properly dried strawberries can last beautifully for several months, when kept in an airtight container in a cool location.
Can you dry strawberries in the oven?
Absolutely. Spread the strawberry slices on parchment-lined sheets in the oven, set to your lowest heat setting.
Results in the oven tend to be slightly less uniform than in a dehydrator, and generally the dry time is shorter. I'd start checking for done-ness after about 3 hours, and then peek in on them about every 20 minutes until they're done.
Can you dry strawberries that are overripe or underripe?
Drying underripe strawberries results in disappointing, tasteless little strawberry-shaped chips. Drying overripe strawberries exacerbates the almost-gone flavor, and doesn't end well.
If you have a huge batch of strawberries to put up, my advice is to take out only the best, most perfect ripe berries for drying. Berries that are slightly underripe could be left to ripen on the counter, or frozen for adding to smoothies with other, more flavorful berries.
For overripe strawberries, I generally salvage the good parts for strawberry jam, and let the chickens feast on the bits that need to be cut out.
Hope you find this process to be quick, easy, and fun. It's also a sure-fire way to make the whole house smell absolutely heavenly!
Cheering you on from Maine,
Anna


Anna Chesley
Anna Chesley is a freelance writer living a homestead lifestyle, with a special love for family travel, old books, vintage skills, and seaside living. In addition to founding Salt In My Coffee, she runs the website, New England Family Life, as well as The 1800's Housewife, a website devoted to re-creating authentic 1800's recipes.

Remini APK premium says
Such a helpful guide—drying strawberries has never sounded so simple.