


Growing new grapevines from cuttings is extremely easy, and it's a fun way to affordably establish a home vineyard! These 4 easy steps will walk you through rooting grapevines for the first time.
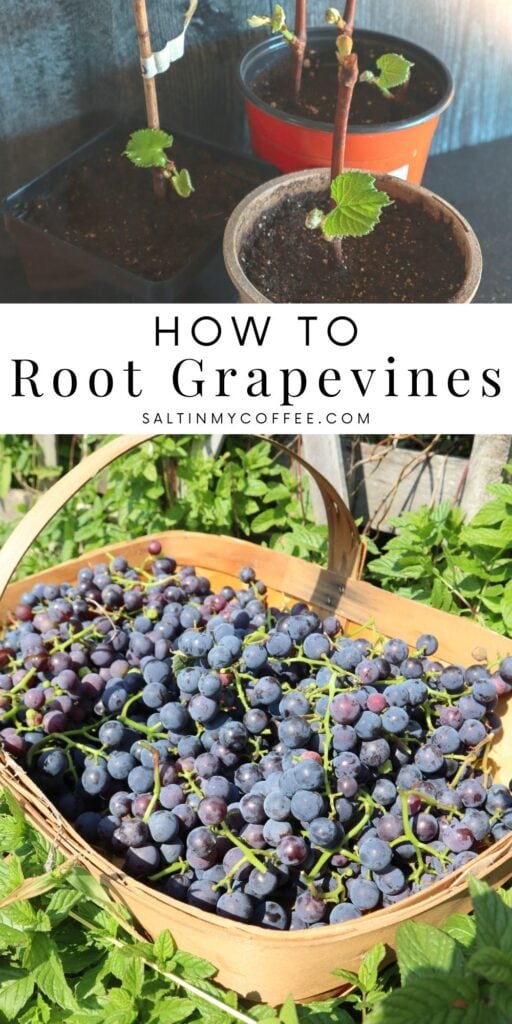
One of my favorite ongoing projects here on our 2-acre homestead, has been establishing our backyard vineyard. Enjoying plentiful grapes from our own land is such a joy!
Researching and selecting hardy grape varieties that can thrive here in Zone 5a has been a fun part of the process. It's amazing to me how many types of grapes there are to choose from, even in our cold climate.
From seedless table grapes, to red and white wine grapes, to grapes that make the best raisins - there really are some great options! The hardest part of my homestead planning each winter, is deciding which grape varieties to add the following spring. Thankfully, adding new grapevines is pretty affordable, since we opt for starting our own vines from cuttings.
Dormant vine cutting are much cheaper than buying established vines, and when done properly, they can actually overtake commercially sold vines that you might buy at a nursery.
Starting robust vines from dormant cuttings is easy and reliable. This quick tutorial will walk you through it, step by step.
Step 1: start with high-quality grapevine cuttings
To get robust grapevines, it's important to start with strong, high-quality vine cuttings. If you have access to the vines you want to propagate, you can take your own cuttings. There are also several places online where you can buy or trade cuttings, opening a world of possibilities when it comes to varieties.
Taking your own cuttings
If you're taking your own vine cuttings, the best time to do this is in the late fall, or during the winter. Once the vine has lost all leaves, and gone dormant for the winter, you're good to go. You'll want to take any cuttings you need before the buds begin to swell in the spring.
The best cuttings come from vines that just grew over the last spring and summer. If you have plentiful vines to choose from, go for strong sections near the base of the young shoot, where the vines are about as thick as a pencil, and buds are close together.
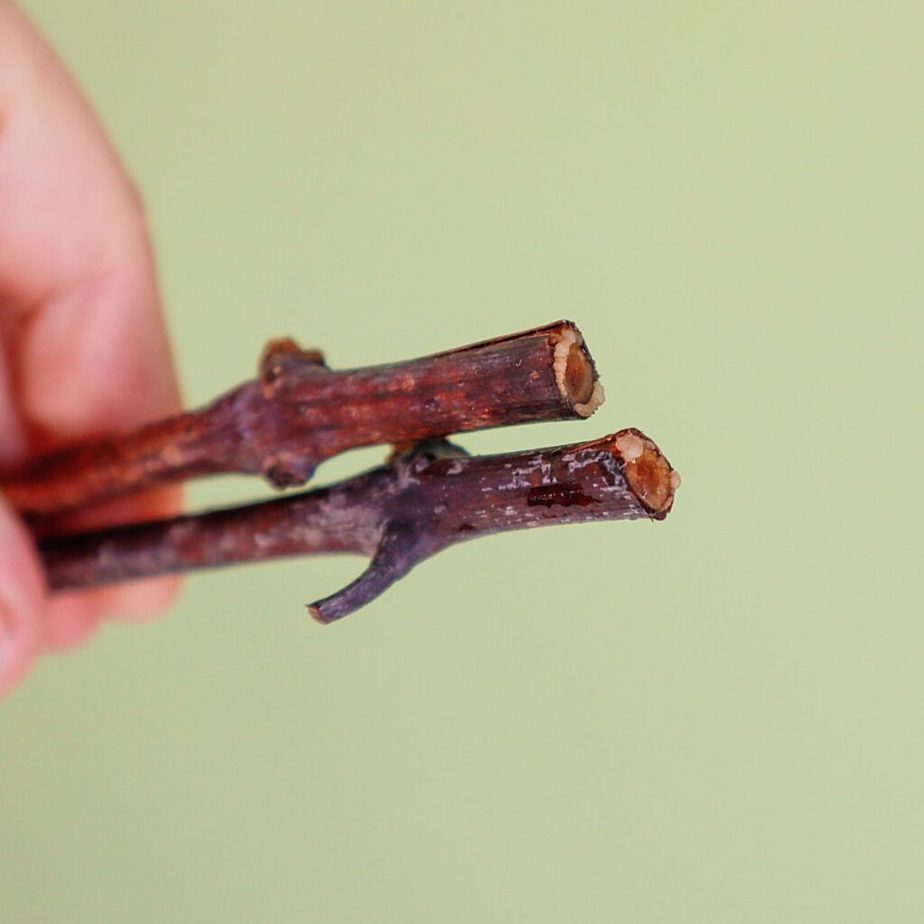
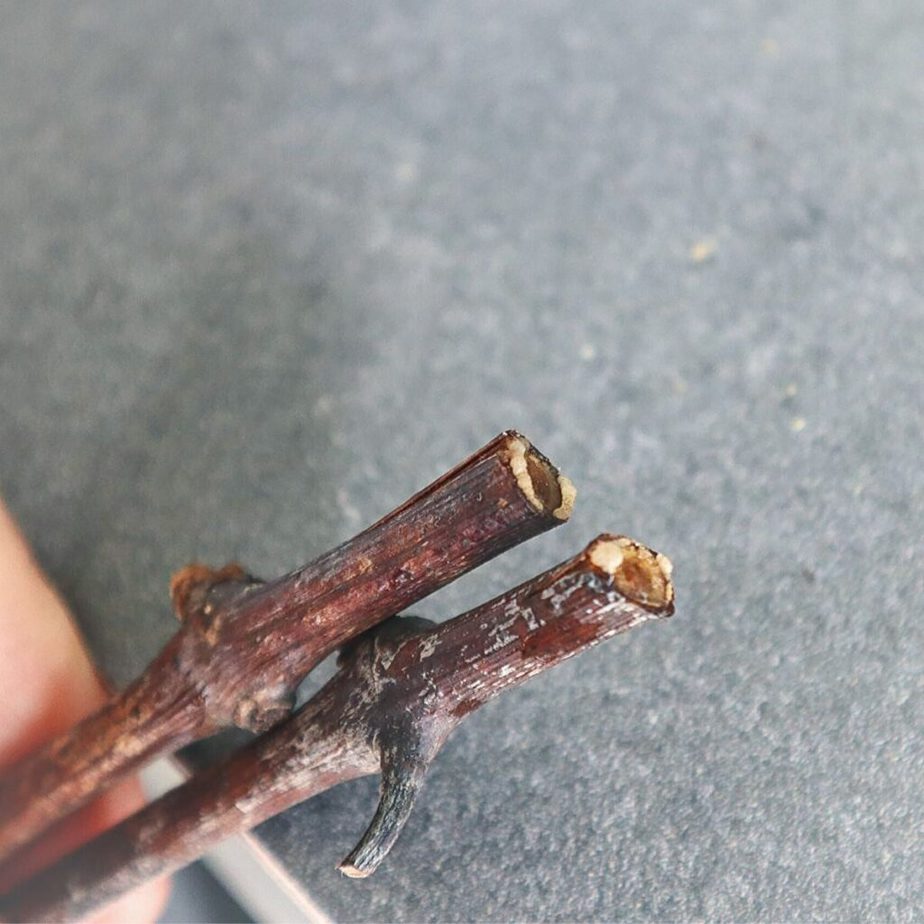
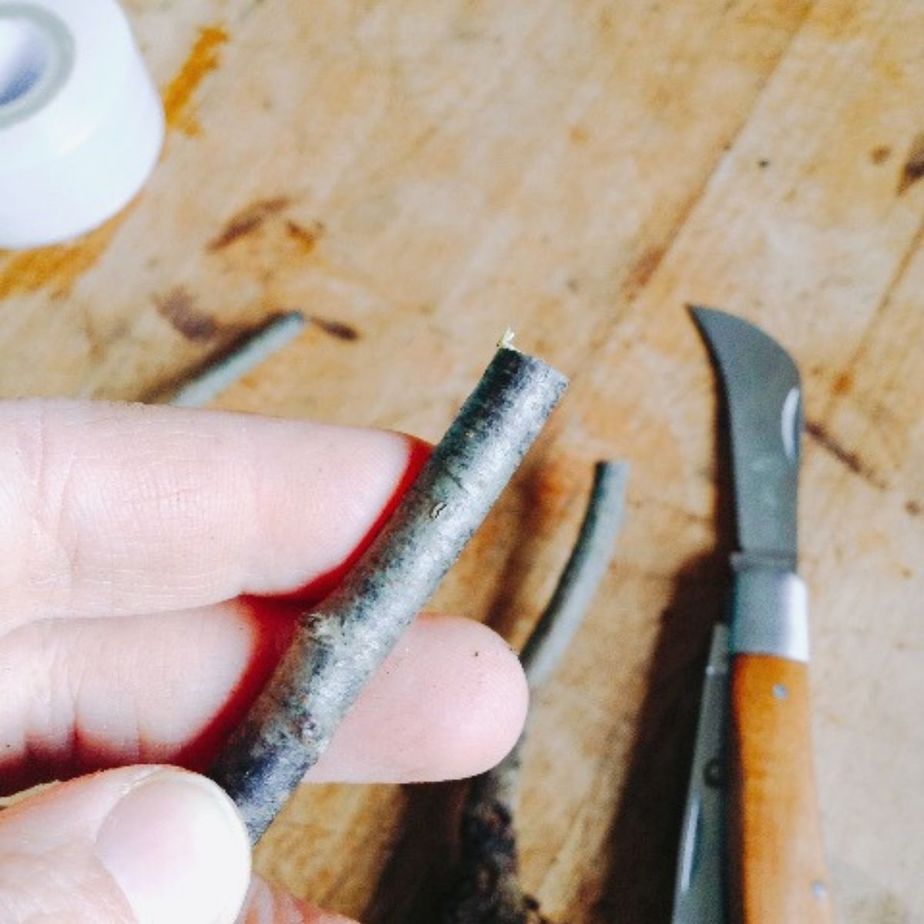
As you take your cuttings, examine the cross section, where you just made your cut. If the cane is brown or tan, or has an unusually large "pithy" center, try taking a cutting from another area of the vine. What you're looking for are cuttings that have nice green wood inside, and with pithy centers that are small, compared to the green woody circumference.
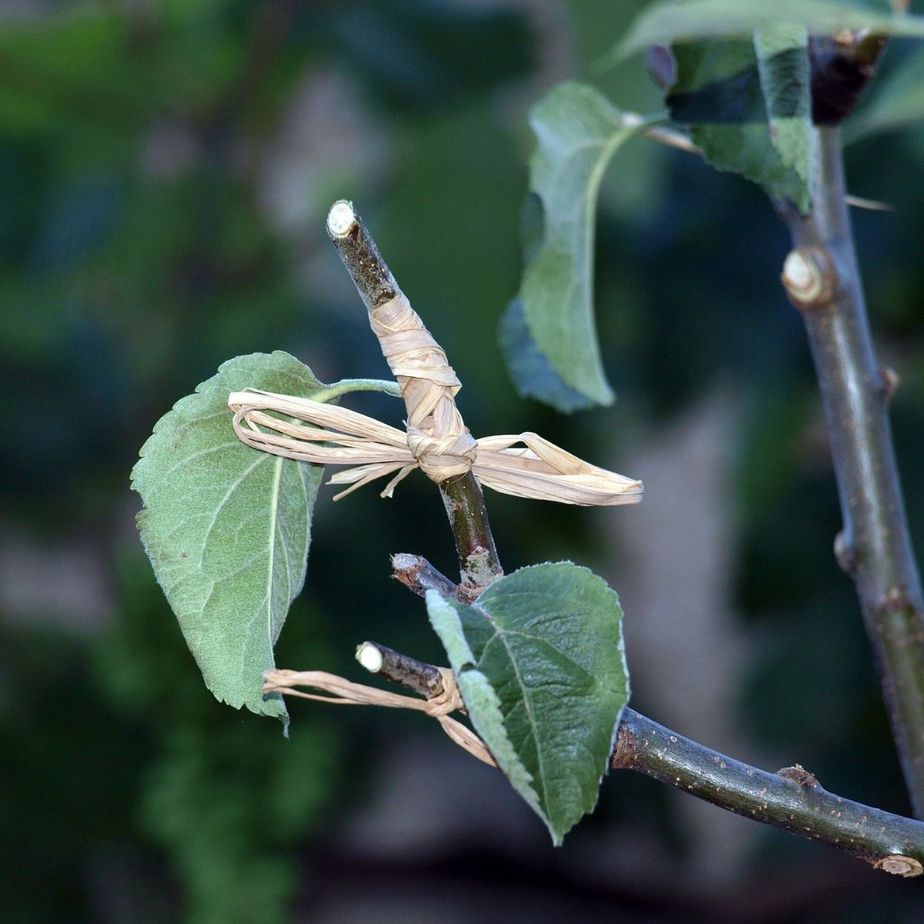
Take cuttings that are about a foot long, with several buds. Make the bottom cut immediately below a bud, and cut straight across. This is where your roots will form. Cut the top diagonally. This will help make it easier to ensure that you place your vine cuttings with the correct side up, as you root them.
Ordering grapevine cuttings
If you don't have access to grapevines from which to take your own cuttings, there are several places online where you can order cuttings of many different varieties.
My favorite place to order cuttings of new grape varieties is Bunchgrapes.com, which is run by Susan Rombough. Her husband Lon maintained a magnificent collection of grape varieties during his life, and she has continued his work by offering cuttings from many of the wonderful grape varieties in the collection.
You can also find grape cuttings of many different varieties offered by various sellers on Ebay, Amazon, and Etsy.
Another option is to join the North American Scion Exchange group on Facebook. There are SO many wonderful folks in that group who offer fruit tree scion wood for sale, exchange, or often just shipping. While it's mainly used to exchange cuttings from fruit trees, many folks also offer grape vine cuttings as well.
Step 2: Callus the vine cuttings
Once you have your dormant cuttings, the first step is to callus them. You want them to grow a circumference of little white bumpy material around the bottom cut edge of the vine section.
Lon Rombough, the grape expert, wrote this about the callusing process:
Callus may not always be obvious, but it must be there before roots develop. Once roots start, they grow in cooler conditions than are needed for callus to form. A grape cutting pushed into soil will just sit until the soil is warm enough for callus to form, so it usually only grows a few inches the first year. But by pre-callusing the cuttings before planting, they can grow much more than they would otherwise, often enough to establish the trunk of the vine, if not more. A callused cutting planted in it's permanent location, kept weeded, watered, and well fertilized, can establish it's roots in place as it grows a top and can often grow enough to allow it to bear a cluster or two the next season.
Ron Lombough, author of The Grape Grower
The absolute best way I have found to quickly develop excellent callus on vine cuttings, is this:
- Wrap the base of each cutting in a little piece of paper towel.
- Next, set all of the cuttings in a large plastic bag, large enough to close over the whole bundle of cuttings.
- Add just enough water to the container so that the paper towel is good and damp.
- Tie the bag up over the cuttings with a twist tie, making a little greenhouse. Don't tie a sturdy knot in the bag, because you want to be able to easily check on the cuttings.
- Set the whole bundle upright in a plastic container. A large yogurt container is my go-to, but anything that keeps the whole bundle sitting steady and upright will work!
- Now, set this whole little "greenhouse" on top of a heat mat, designed for plants or seedlings. (If it has multiple heat settings, the lowest is probably fine!)
The idea here is that you want the paper-towel-wrapped bases of the cuttings to stay warm and damp - but you don't want the whole cutting to start putting out shoots and leaves yet. Vines will be be most robust and resilient if they focus on putting out strong roots before growing foliage. So keeping the base of the cuttings warm, while the rest of the tall cuttings are relatively cool, helps accomplish this. This technique works very well for rooting elderberry cuttings as well!
I have rooted many grape vine cuttings in several different ways, but this method, with a heat mat, creates by far the most robust calluses in the shortest amount of time.
A heat mat is a great thing to have in your gardening arsenal, but even if I were just using one for starting grapevine cuttings once a year, I would absolutely consider it a worthwhile investment. This is the exact mat I use.
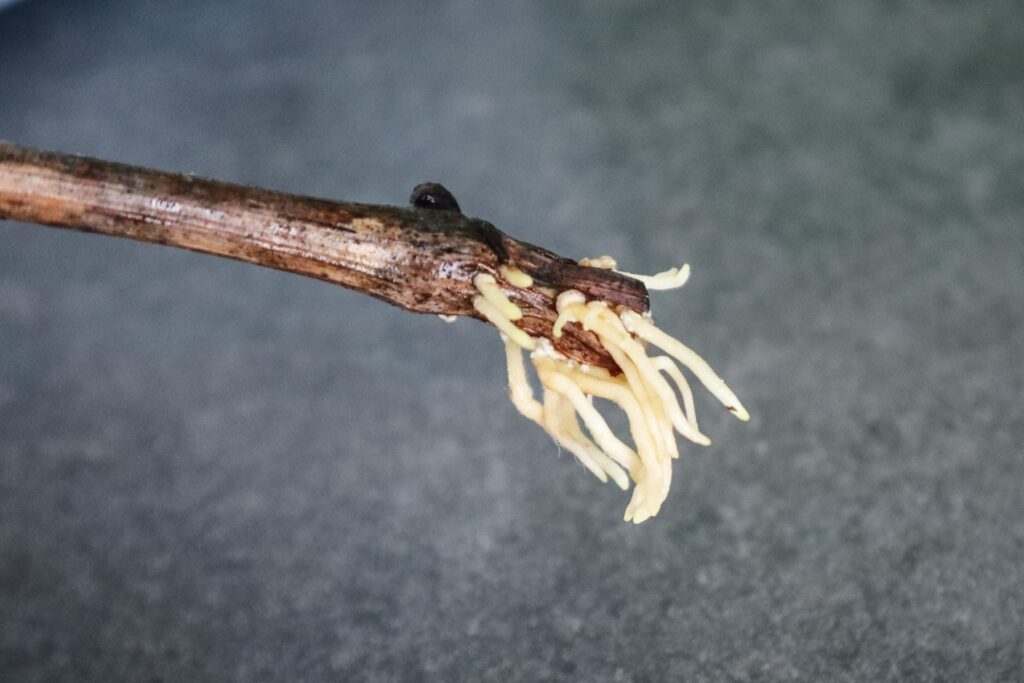
It usually doesn't take long to start seeing callus on the bottom of your grapevine cuttings, and once it forms, it will grow quickly.
I like to start checking on my cuttings after about 5 days, and then I usually check on them about every other day following. Once there's a good "furry-looking" bundle of callus formed around the end of the cutting, it's ready to plant in the soil. I like to let about twice as much callus build up as what you see in the photo above.
However, if you wait too long to plant your callused grape vine cuttings, they'll quickly send out roots. Sending out roots really isn't a problem, except that they're quite delicate, and can easily break in the planting process - wasting valuable energy the vine will have to put into regrowing new ones.
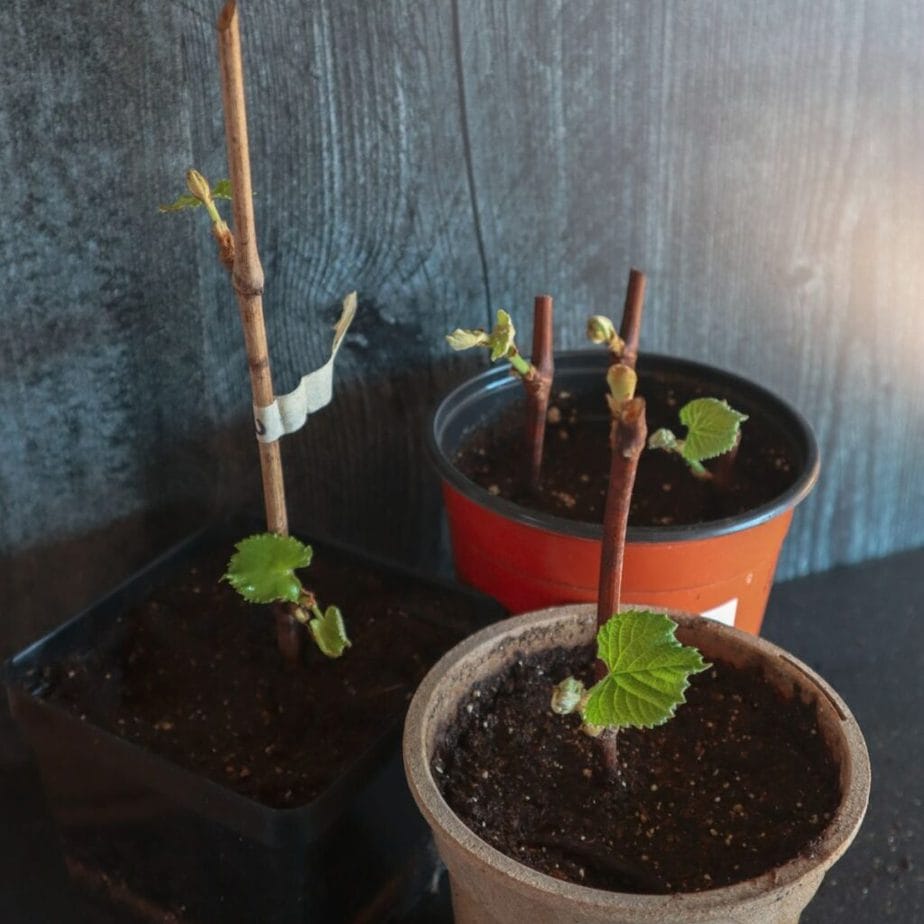
Step 3: Pot up the callused cuttings
Cuttings develop callus and roots in a short time - usually a matter of days. If you're eager to get them started before your permanent planting site is ready, you can plant them in pots inside until the ground is ready. I often do this, and it works fine!
Either way, you'll want to have everything you need for planting the vines ready, within days of setting your cuttings to callus.
Deeply dig the hole where your grape vine will grow, loosening the soil so the new roots can easily establish. If you're starting your vines in pots, I recommend using 1 gallon pots or larger, with a nice soil designed for raised beds or general garden use.
Set the cuttings carefully with at least half of their length below the soil level. Fill around the vine, firming the soil just enough to keep the vine steadily in place.
Water as needed to keep the soil slightly damp, as the roots are rapidly growing. You don't want the vines sitting wet, but getting too dry is definitely detrimental.
Step 4: Plant out the rooted grapevines in their permanent location
One the ground is ready for planting, you can get your new grape vines in the ground. Dig the hole where your grape vine will grow, deeply loosening the soil so the new roots can get well established.
Continue to keep your vine well watered through its first season. Again, you don't want the vines to be sitting wet. However, letting the ground get too dry really will prevent the vine from getting as well-established as possible during this first year.
To boost growth, you can lightly fertilize with a balanced fertilizer every other week or so, until mid-summer. After that, it's a good idea to let things start winding down toward the vine's first dormant season, as fall approaches.
One additional thing that I found drastically boosted the growth of my young vines, was the use of grow tubes. My favorite are these Blue-X tubes.
Install them when you plant your new grape vines, and leave them up for the whole first season. Last year, I used grow tubes on half of my newly planted vines, and not on the other half. I was BLOWN AWAY by the difference in growth. On average, my vines with grow tubes grew 90% taller than those without the tubes. They also had more foliage, and were more robust.
They're definitely an investment, and if you're starting your vineyard on a shoestring budget, don't be discouraged. Grow tubes aren't necessary for success - they just really help to get as much growth established as possible during that first season!
Rooting grapevines is one of my favorite activities that I look forward to every winter. I feel like I'm watching my vineyard grow, right in my kitchen. It's easy, and great way to add new varieties of grapes without spending much!
Have any questions about propagating grape vines from cuttings? Ask away in the comments below! I'll do my best to help!
Read Next: Winter Gardening Projects

Anna Chesley
Anna Chesley is a freelance writer living a homestead lifestyle, with a special love for family travel, old books, vintage skills, and seaside living. In addition to founding Salt In My Coffee, she runs the website, New England Family Life, as well as The 1800's Housewife, a website devoted to re-creating authentic 1800's recipes.
Danielle Vanhorn says
so I did not use this method for rooting. I cut the bark at the base of the vine, dipped them in rooting hormone, and covered the vines 1/2 way with medium. how will I know when it's been long enough?