


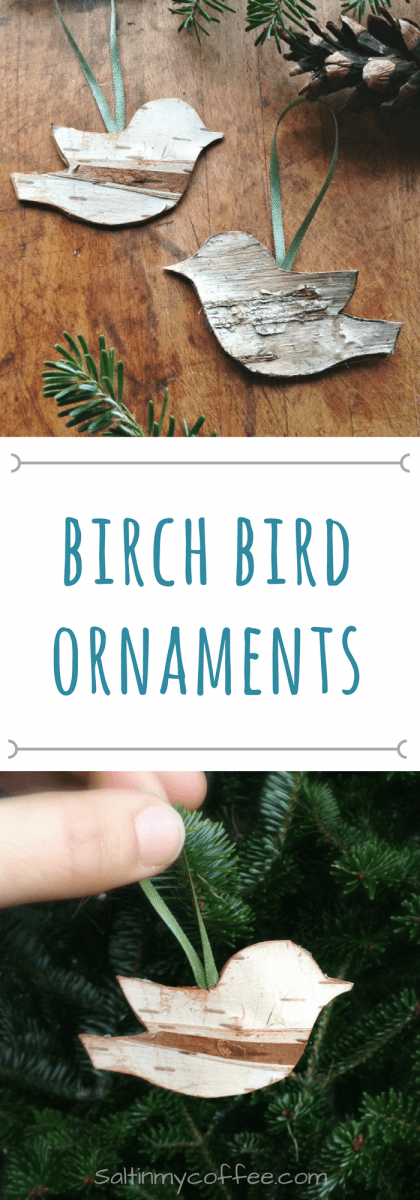
These little birch bark birds make easy handmade ornaments, and they're so adorable! These step by step instructions and printable template will make it easy to create your own flock of little birch birds!

Last weekend we went Christmas tree hunting. One thing I'm definitely discovering about parenting is that life with little ones makes holidays SO much more fun! With a one year old and a three year old in tow, this year's tree-hunting adventure was by far the best yet.
The snow flurries. The frozen noses. The Sisyphean ordeal of keeping toddler hats covering little ears. And that very serious hunt for the "BEST" tree ever. It was great, and we had way too much fun!
We'd hardly arrived back home, and put the tree up, when Izzy started asking about decorating it.
Now - everyone always told me that boys and girls are different. I don't know whether that's it, or whether my kids just march to the beat of VERY different drums.
When Izzy was a year old, somehow ornaments on the tree were never an issue. We told her once that she should leave them on the tree...and she did! Now...my little Duncan monkey is a whole different story. Let's just say that this year, there can't be anything remotely breakable on the lower half of the tree.
Which meant, I needed a lot more unbreakable ornaments.
I've always loved ornaments made from natural materials, so I decided to make us a flock of little birch birds to perch in the lower branches. For this year, the upper boughs can be the domain of my husband's treasured Star Wars ornaments, and the breakable figurines that we collected in our early travels.
The nice thing about these little woodsy little birds is that there's really no harm done if they get turned into playthings, or even chewed on a bit. And - they're super easy to make! Here's how...
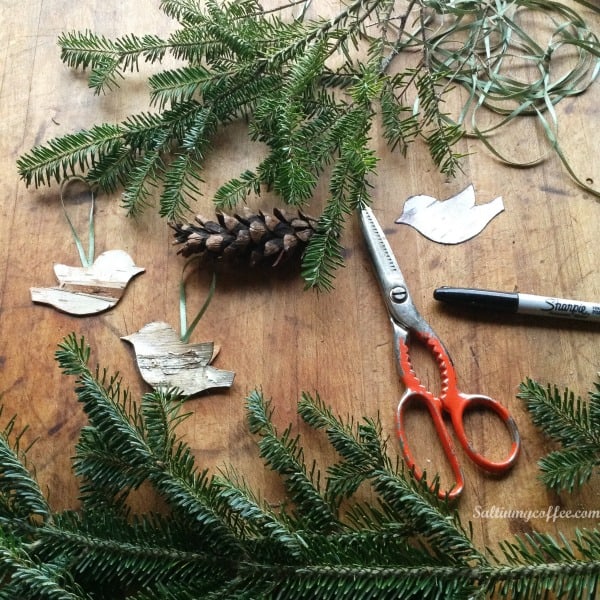
Birch Bird Ornaments
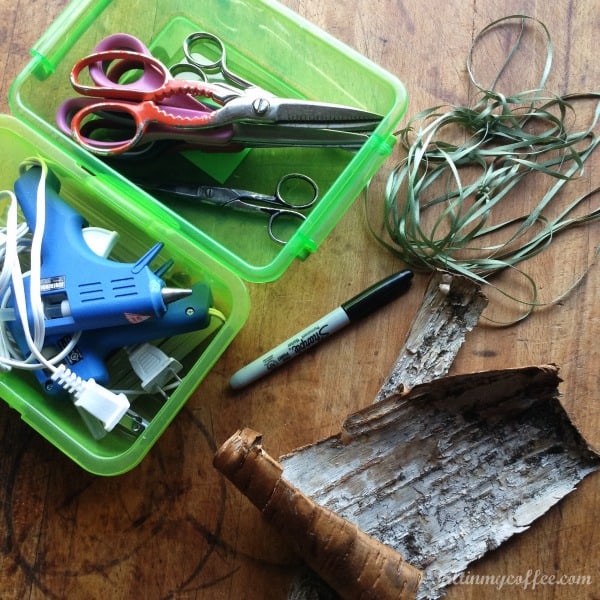
Materials you'll need:
- birch bark
- marker
- sharp scissors
- narrow ribbon
- hot glue gun
- birch bird template
Start by gathering some birch bark. PLEASE don't peel this from live trees. It damages the tree, and it's not necessary - anywhere you find birch trees, you're bound to find some very suitable pieces of bark lying around, if you look on the forest floor a bit. Also, if you heat with wood, chances are you may have lots of birch right in with your cord wood. That's where I grabbed mine this year...I had so many pieces of nice white birch right in the wood box, I just peeled a few big swaths of bark off of those.
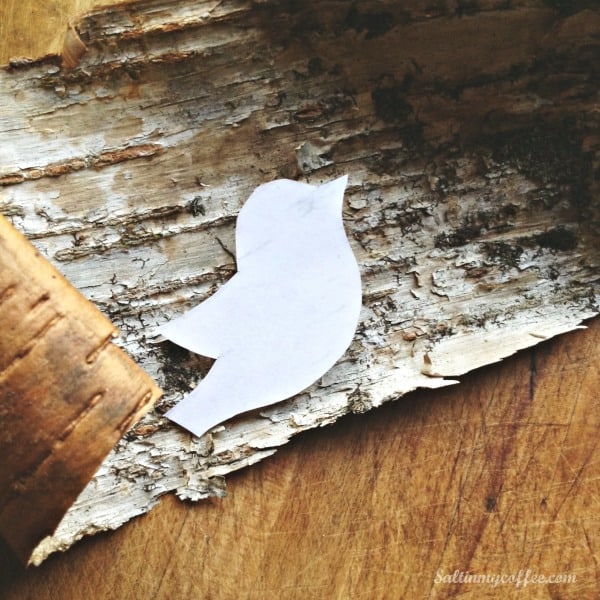
Once you have your bark, you'll want to print out the template (you can print it here), and cut out the bird shapes. You really just need one, but sometimes it's easier to trace and cut out both sides at one time, so I've included two on there.
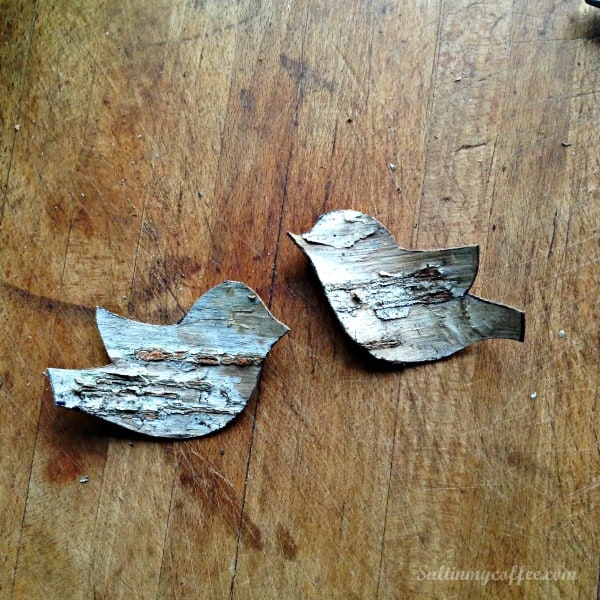
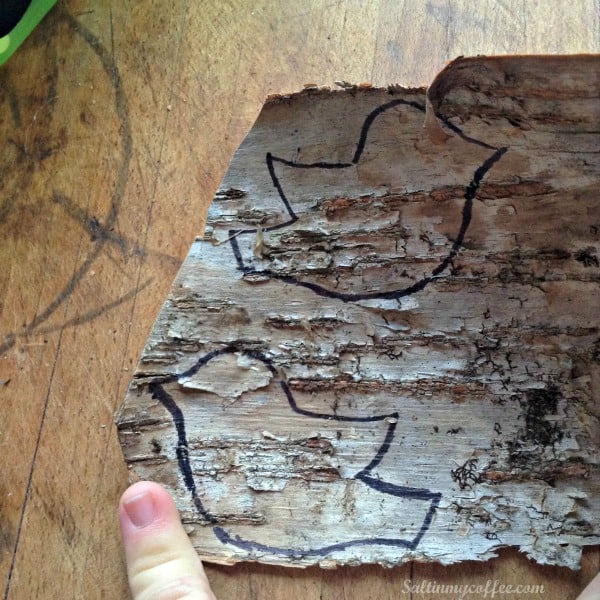
With a marker, trace the bird shape onto the right side of the bark, one facing in each direction.
Using sharp scissors, cut out the bird shapes.
Then cut your ribbon for hanging the bird...a four inch length of narrow ribbon works perfectly.
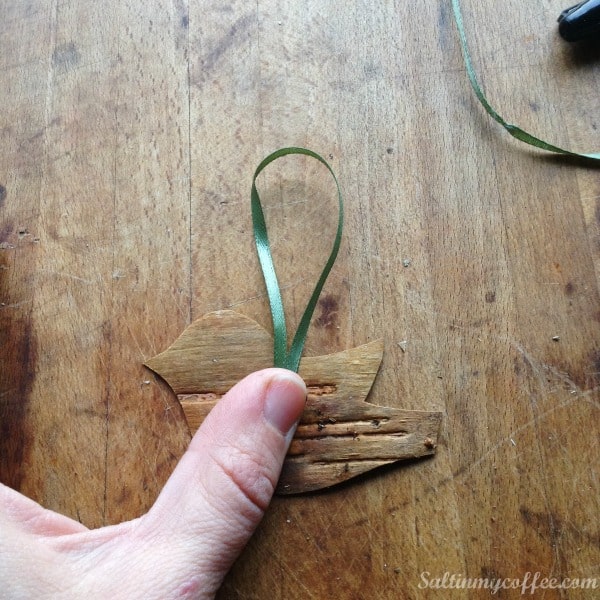
Now it's time to get out the hot glue gun. Start by putting a tiny dab of hot glue in the center of one of the birch birds, on the wrong side. Press the ends of the ribbon into the hot glue and make sure they're well fastened down.
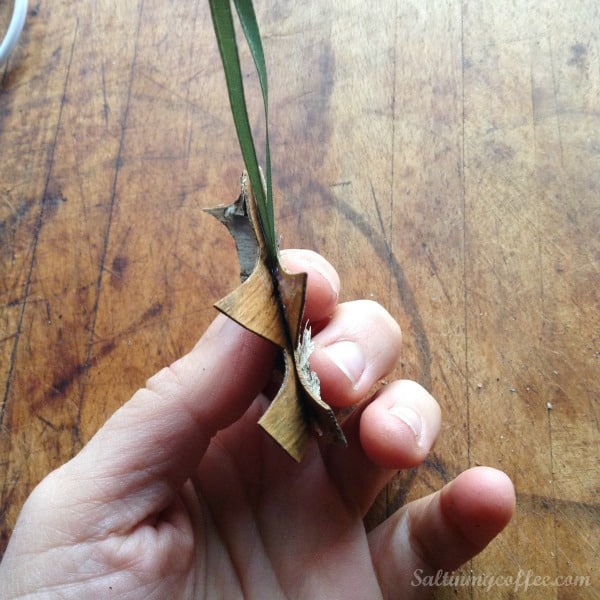
Then, working quickly, put hot glue on the rest of the wrong side of that bird. Now align it with the wrong side of the other bird, and hold them tightly together while the glue solidifies. Unless you are a master glue gun ninja, you'll probably have areas along the edge that need more glue (like the tail, wings, and beak in the photo below) Go around the edge, adding glue and firming up any areas that need to be better adhered.
One thing I like to do with a few of the birds is actually to leave their little wings unglued, so that they're a bit separated as if in flight. I like it that between the different patterns in the bark, and a few tiny tweaks like this, a whole flock of these little beauties can each be so different!
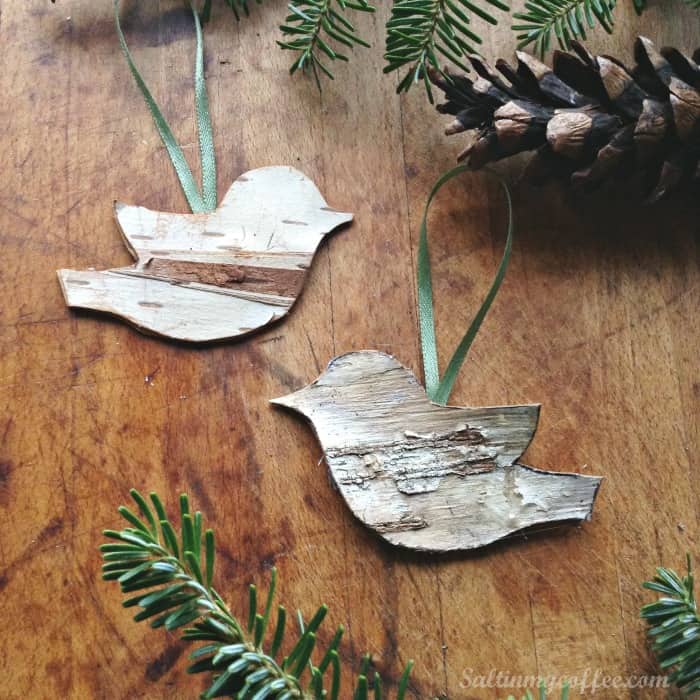
As soon as your glue firms up, that's it! Your bird is ready for its new home on the tree.
These little cuties also make adorable additions to gift wrapping, and you can even use them as gift tags by writing the recipient's name right on them...I find that a ball point pen works just fine.
One other fun way to use this template is to turn them into magnets instead of ornaments. Instead of fastening the ends of a ribbon loop in the center, glue in one of these tiny magnets. They are plenty strong to work right through the bark. Glue the two sides of the bird together right around the magnet, being firm about lining up the edges - they make cute (and STRONG) magnets!
Pin for later:

Anna Chesley
Anna Chesley is a freelance writer living a homestead lifestyle, with a special love for family travel, old books, vintage skills, and seaside living. In addition to founding Salt In My Coffee, she runs the website, New England Family Life, as well as The 1800's Housewife, a website devoted to re-creating authentic 1800's recipes.
Karen Merhalski says
Oh my Gosh!!!! These are so adorable! Anna.....you are just so darn creative! What a wonderful idea! (I am secretly hoping that one of these are either in or on my package) 🙂 I love, love these! Another wonderfully written article and such a creative idea! THANK YOU!